Mastering camping water storage: A complete outdoor guide

When you're packing for a trip, having a solid plan for your water is just as important as remembering your tent or sleeping bag. It boils down to a reliable system for carrying, storing, and accessing clean water when you're miles from the nearest tap. The golden rule is to plan for 1 gallon per person, per day, but how you carry it makes all the difference—from sturdy jugs at your base camp to collapsible bottles you can tuck in a pocket.
Why Smart Water Storage Is Your Most Important Gear
Picture this: you’ve just hiked into a gorgeous, secluded campsite after a long day. You're tired, thirsty, and ready to relax. But when you go to the designated water spigot, it's bone dry. All of a sudden, that two-liter bottle you casually tossed in your pack feels completely inadequate. Your entire trip now hinges on the water you have with you.
That exact scenario is what this guide is all about. We're moving past the "hope for the best" approach and giving you a real framework for managing your water supply, whether you're car camping for a weekend or overlanding for a month. You'll learn how to figure out exactly what you need and build a flexible system with the right gear for the job.
The Evolution of Portable Hydration
Thinking strategically about water on the go isn't a new concept. It really took off back in the 1980s with the hydration pack revolution. When CamelBak patented its first bladder-in-a-backpack system in 1989, it cut dehydration incidents among ultramarathoners by a whopping 40%. That was a huge wake-up call, and it sparked a massive surge in portable water solutions.
Fast forward to today, and the camping industry is booming. It's expected to jump from USD 19.64 billion in 2023 to USD 29.83 billion by 2032. Hydration gear makes up a massive 18% of that market—that’s over USD 5 billion in demand for things like collapsible bottles and portable tanks. If you're curious, you can dive into the full camping equipment market analysis to see just how big this is.
A well-planned water system does more than just quench thirst; it provides peace of mind, freeing you to focus on the adventure instead of worrying about your next refill.
This is where smart, modern gear really shines. HYDAWAY's space-saving collapsible bottles are a game-changer for personal hydration. Imagine you’re at a music festival campsite and need to carry water from a central spigot back to your tent. Instead of lugging a rigid, empty bottle back with you after you've had a drink, you can collapse your HYDAWAY bottle down to just over an inch thick, slip it in your pocket, and free up your hands. It’s all the capacity you need without sacrificing convenience or space. Our goal is to arm you with practical strategies to make sure you’re always prepared, hydrated, and ready for whatever your adventure throws at you.
Calculating Your True Water Needs for Any Scenario
That old "one gallon per person per day" rule is a decent starting point for camping, but honestly, it’s often too simple for the real world. Your actual water consumption hinges on a handful of key variables that can dramatically change how much you need. Blindly following a generic rule can leave you either dangerously short or hauling unnecessary weight.
Think about it this way: a weekend spent lounging by a cool lake in Maine requires a completely different water budget than a week of strenuous hiking in the high-altitude, arid climate of Utah. The first scenario is low-exertion in a mild environment, while the second involves intense activity, higher altitude, and dry air that pulls moisture from your body with every breath.
Factors That Shape Your Water Budget
To get a real handle on your needs, you have to look beyond a basic drinking recommendation and consider the full picture. Every part of your trip plays a role.
- Activity Level: A day of reading in a hammock versus a 10-mile hike with a big elevation gain? Two totally different hydration requirements. The more you sweat, the more water you have to replace.
- Weather and Climate: Hot, dry, and windy conditions ramp up your body's water loss through both sweat and breathing. A forecast of 95°F in Joshua Tree demands a much larger water supply than a 65°F day in the Pacific Northwest.
- Altitude: At higher elevations, the air gets thinner and drier, causing you to lose water more rapidly just by breathing. Your body also works harder up there, kicking your metabolic rate and fluid needs into high gear.
- Food and Cooking: Rehydrating those freeze-dried meals, boiling pasta, and brewing your morning coffee all dip into your water reserves. These cooking needs can easily add up to a liter or more per person each day.
- Personal Hygiene: Little things like washing hands, brushing teeth, and cleaning dishes require a surprising amount of water. Factoring this in keeps you from using your precious drinking water for cleanup duty.
For those who really want to dial in their planning, you can even learn how to calculate your individual sweat rate. This detailed approach helps you personalize your hydration strategy so it’s just right for you.
Daily Water Needs Per Person For Camping
To help you get started, here's a table with some realistic estimates for different scenarios. Use it as a guide to plan your water haul more accurately.
| Activity/Climate | Drinking Water (Liters/Day) | Cooking & Hygiene Water (Liters/Day) | Total Water Needed (Liters/Day) |
|---|---|---|---|
| Relaxed, Cool Climate | 2–3 | 1–2 | 3–5 |
| Moderate Hiking, Temperate | 3–4 | 1.5–2 | 4.5–6 |
| Strenuous Hiking, Hot/Dry/High Altitude | 4–6+ | 2–3 | 6–9+ |
Remember, these are just starting points. It's always best to adjust based on your specific trip details and personal needs.
Building a Practical Plan
Let’s put this into practice. Imagine a family of four car camping for three days in Zion National Park in late spring. The days are warm, and they plan on doing some moderate hikes.
For drinking alone, each person will need about 3-4 liters per day because of the activity and dry air. For a family of four over three days, that's 36-48 liters just for drinking.
Now, add another 4-5 liters per day for cooking pasta, making oatmeal, and brewing coffee, plus another 2-3 liters for washing hands and dishes. All of a sudden, their total need is closer to 54-66 liters (14-17 gallons)—way more than the simple "one gallon per person per day" rule would suggest.
This is a big reason why the demand for reliable water storage is growing.
As you can see, hydration gear makes up 18% of the camping market—it's a critical piece of any modern camper's setup.
The Role of an Emergency Buffer
Always pack more water than your calculations suggest. A 20-25% emergency buffer is a smart safety net for unexpected delays, accidental spills, or helping a fellow camper in need.
This is where a flexible system really shines. Your main storage might be large jugs at camp, but each family member can carry their own HYDAWAY 25oz collapsible bottle for day hikes. Once empty, they collapse to just over an inch thick, fitting easily into a pocket or pack. This means the kids can manage their own water on the trail without the bulk of a traditional bottle, giving them independence while ensuring everyone stays hydrated. This layered approach helps you manage your water budget effectively and stay prepared for whatever the trail throws at you.
Building Your Perfect Water Storage System
When it comes to camping water storage, there isn’t a single "best" container. Forget looking for one magic jug—the real secret is building the best system for your specific adventure. A solid setup is all about layering different types of containers to cover all your bases, from bulk storage at camp to personal hydration on the trail.
This approach gives you ultimate flexibility. Think of it as a modular toolkit where each piece has its own important job.
The Core Components of a Layered System
A well-rounded strategy usually involves three layers: a main reservoir for bulk water, secondary containers for group use around camp, and personal bottles for individual hydration. Combine them, and you’ve got an efficient system that can scale up or down with your needs.
Let's break down the gear and see where each piece fits.
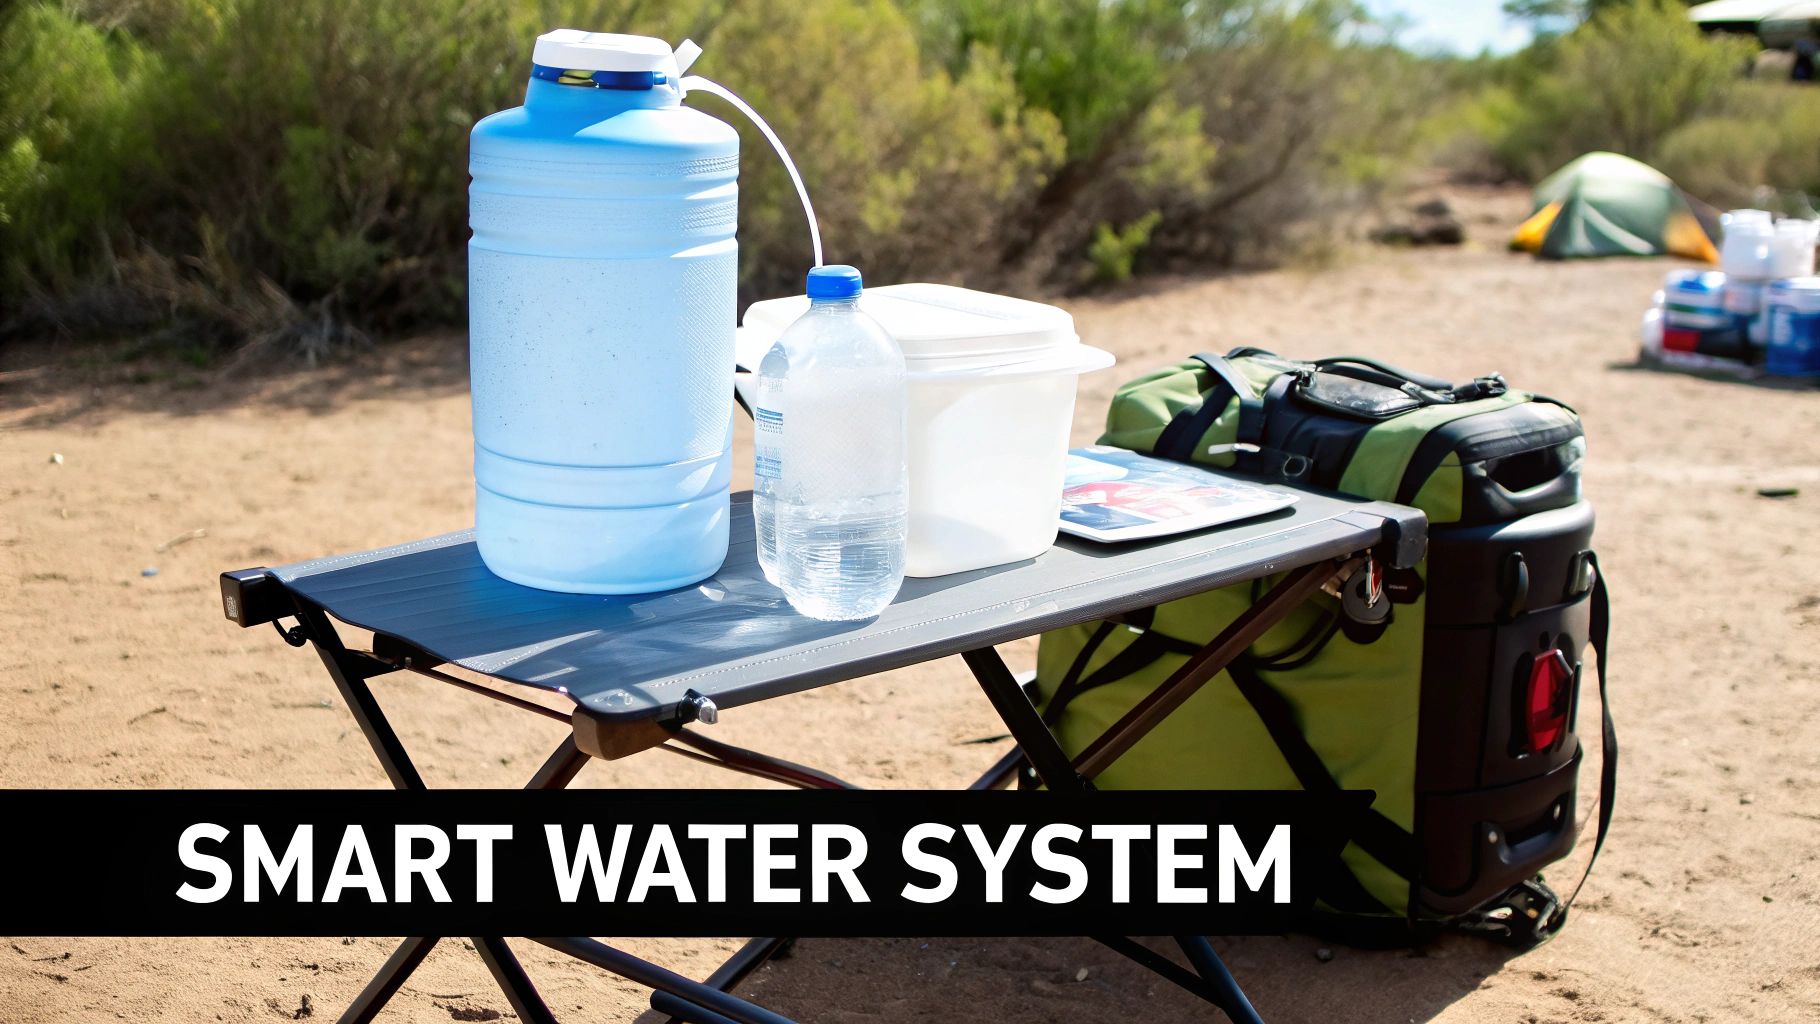
- Rigid Water Jugs: These are the workhorses for car camping and overlanding. Usually holding 5-7 gallons, they act as your main water tank at basecamp. Fill one up at home, and you’re set for cooking, cleaning, and refilling smaller bottles.
- Hydration Bladders/Reservoirs: Tucked inside a backpack, these flexible bags (typically 2-3 liters) let you sip hands-free through a tube. They're a game-changer for long hikes or bike rides where stopping to grab a bottle is a pain.
- Collapsible Bottles and Jugs: This is where modern gear really shines. Big collapsible jugs can supplement your main tank, while personal-sized collapsible bottles are perfect for day trips. They pack down to almost nothing when empty, freeing up precious space.
On a recent weekend trip, our group used a 7-gallon rigid jug as our main water source at the campsite. For our day hike, instead of carrying bulky, half-empty bottles, we each took a HYDAWAY 25oz collapsible bottle. Once they were empty, the bottles squished down to just over an inch thick and disappeared into our pack lids. It saved a surprising amount of space and cut out that annoying sloshing sound.
Choosing Your Primary Storage: The Basecamp Reservoir
Your primary container is the foundation of your whole system. It’s the big-capacity beast that holds most of your water right at the campsite.
For car campers, van lifers, and overlanders, the undisputed champ is the rigid, BPA-free plastic jug. Look for durable, food-grade options with a sturdy handle and—this is key—a reliable spigot. A spigot turns the jug into a mini-faucet, making it super easy to wash hands or fill a pot without wrestling a heavy container.
A 7-gallon jug is often the sweet spot. For a couple on a three-day trip, that’s usually plenty for drinking, a couple of simple meals per day, morning coffee, and basic hygiene, all without needing a refill.
Secondary and Personal Containers: Portability and Convenience
This is where you get to customize your setup for day-to-day activities. While the big jug stays back at camp, your secondary and personal containers come with you.
This is where collapsible gear becomes an absolute lifesaver. A HYDAWAY collapsible bottle is the ideal personal container. It’s light, holds a generous 25 ounces, and is perfect for staying hydrated around the campfire or on a short hike. Its real superpower is packability; when it’s empty, it takes up virtually no space. For example, after finishing your water on a short afternoon hike, you can collapse the bottle and clip it to a belt loop, keeping your hands free for scrambling or taking photos on the way back to camp.
For longer treks away from basecamp, a hydration bladder is an awesome choice. The hands-free design encourages you to drink more often, which is crucial for staving off dehydration. A 3-liter bladder is usually more than enough for a full day of hiking in moderate weather.
The best water storage system is one that adapts to your plans. Combine a large, stationary reservoir with portable, lightweight options you can grab for any activity. You'll never get caught without water.
A Look at How Far We've Come
It's easy to take modern water storage for granted. Imagine setting up camp in Yellowstone National Park, where over 4 million visitors now explore each year, many relying on today’s gear for multi-day treks. It wasn't always this simple. Back in 1910, the U.S. Forest Service was recommending basic canvas water bags that held just a few liters. Those early containers were notorious for leaking and growing bacteria, leading to dysentery outbreaks where up to 15% of backcountry hikers reported waterborne illnesses by the 1920s.
Comparing Materials: Plastic vs. Stainless Steel
The material of your container plays a big role, too. The two most common options are BPA-free plastic and stainless steel, and each has its place.
| Material | Pros | Cons | Best For |
|---|---|---|---|
| BPA-Free Plastic | Lightweight, affordable, often translucent to see water level, available in rigid and collapsible forms. | Can retain flavors or odors if not cleaned properly, susceptible to scratches. | General camping, backpacking, bulk storage jugs. |
| Stainless Steel | Extremely durable, does not retain flavors, often insulated to keep water cold. | Heavier, more expensive, can be dented, cannot see water level inside. | Insulated personal bottles, keeping drinks cold at camp. |
For a truly versatile system, a mix of both is the way to go. Use a big BPA-free plastic jug for your bulk water, then supplement with personal bottles based on preference—maybe a stainless steel one for icy water at the campsite and a HYDAWAY collapsible bottle for lightweight adventures. Our guide on collapsible water containers for camping breaks down even more benefits. This hybrid approach really gives you the best of both worlds.
Transporting Water Without Leaks or Hassles
Getting your water to the campsite is just as critical as having enough of it. I’ve seen it happen: one leaky jug can ruin expensive gear, make a giant mess, and throw your entire hydration plan into chaos before you’ve even hammered in the first tent stake.
The good news is that preventing a soggy disaster is pretty straightforward. A few road-tested strategies for secure camping water storage can prevent leaks, stop contamination, and keep everything stable, no matter how bumpy the trail gets.
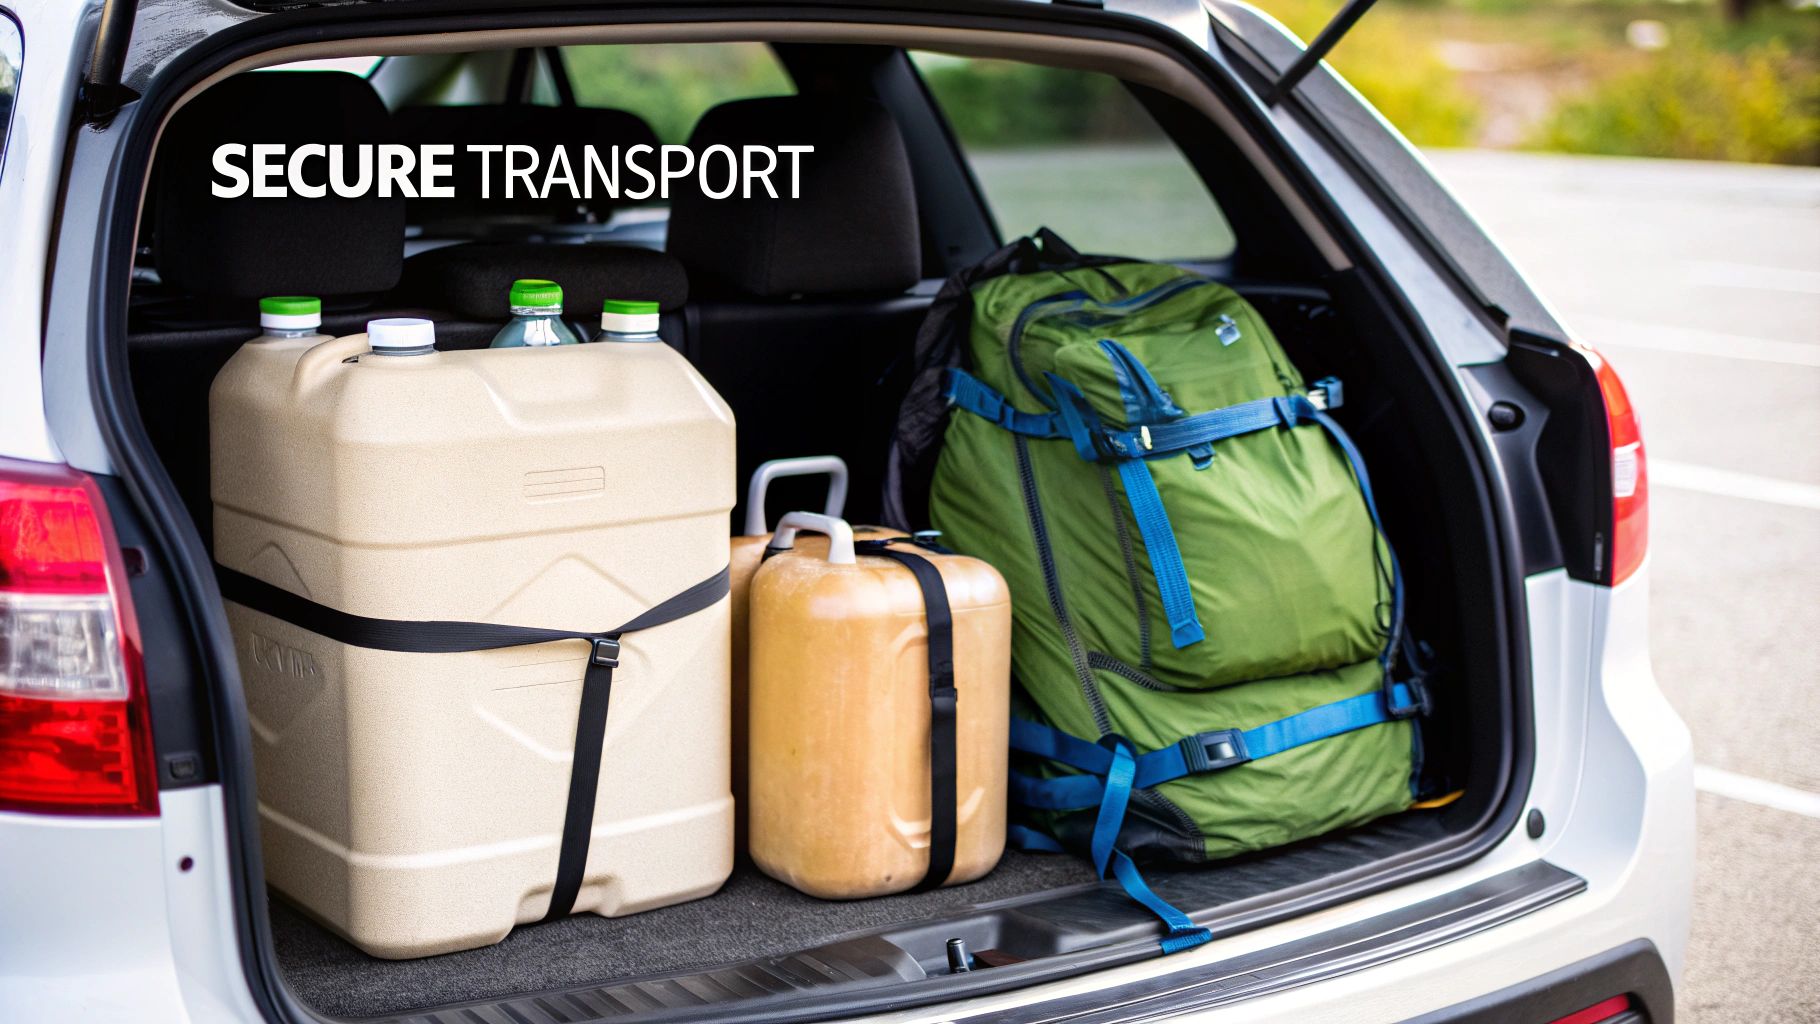
Think of your water containers like any other heavy cargo—they need to be properly secured. A loose, multi-gallon jug can become a dangerous projectile during a sudden stop. It’s all about making simple adjustments to how you pack.
Secure Packing for Car Campers and Overlanders
When you're driving to a campsite, your main opponents are gravity and momentum. The trick is to create a low, stable center of gravity with your heaviest items.
- Pack Low and Centered: Always place those heavy, full water jugs on the floor of your vehicle. The sweet spot is in the middle or right over the axles. This makes them far less likely to tip over on winding roads. Whatever you do, don't put them on the seats.
- Wedge Them In: Pack softer gear—like sleeping bags, duffel bags, or camp chairs—snugly around your water containers. This creates a natural buffer that stops them from sliding around during the drive.
- Lids Up and Tightened: It sounds obvious, but it’s surprisingly easy to forget: double-check that every single cap, lid, and spigot is screwed on tight. Always store jugs upright to reduce pressure on the seals. For extra peace of mind, it’s worth investing in bottles designed to be leak-proof. If you're looking for an upgrade, our guide to leak-proof travel bottles can help you find one that can handle the rigors of the road.
Here’s a classic mistake: leaving water containers in direct sunlight inside a hot car. This creates the perfect breeding ground for algae and bacteria, which can make your fresh water taste funky or even unsafe. Always cover your containers or pack them somewhere cool.
Van Life and Built-In Tank Considerations
For van lifers and RVers, built-in water tanks introduce a whole different set of challenges. Since the tank is part of your rig, the focus shifts from smart packing to proper installation and maintenance.
A securely mounted tank is completely non-negotiable. Regularly check that all brackets and straps are tight, with no signs of rust or wear. A loose tank can put a ton of strain on your plumbing connections, eventually causing slow leaks that can lead to serious water damage. Don’t forget about proper ventilation, either—it’s crucial for preventing pressure buildup.
Backpacking With Efficiency and Balance
When you’re carrying everything on your back, water transport becomes a delicate dance between capacity, weight, and ergonomics. Every ounce counts, and how you carry that weight directly impacts your comfort and stability on the trail.
The best place for hydration reservoirs or full water bottles is close to your spine and centered in your pack. This keeps the heaviest part of your load aligned with your own center of gravity, which makes the pack feel lighter and prevents it from pulling you backward.
This is where collapsible gear really shines. You can start a hike with your HYDAWAY collapsible bottles completely compressed, saving a ton of space and cutting down on initial weight. For instance, if you know there’s a reliable stream a few miles from the trailhead, you can carry your pack lighter for the first big climb and fill up closer to your campsite. It’s a smarter way to manage your effort without compromising on hydration.
Mastering Water Purification on the Trail
Even the most pristine-looking mountain stream can hide invisible threats like bacteria, protozoa, and viruses. Trusting your eyes is a gamble you just can’t afford to take out there. Think of this as your field guide to turning natural water sources into safe, drinkable hydration, ensuring your adventure isn’t cut short by a nasty waterborne illness.
Knowing your purification options is key. The right method really depends on where you are, what the water looks like, and your personal setup. Let’s break down the most common and effective choices I’ve relied on over the years.
Comparing Popular Purification Methods
When it comes to making backcountry water safe, you’ve basically got three tools in your arsenal: filters, chemical treatments, and UV purifiers. Each has its own strengths and is best suited for different situations.
-
Water Filters: These are the real workhorses of the trail. Devices like the popular Sawyer Squeeze or Katadyn BeFree use a physical barrier with microscopic pores to block nasty bacteria (like E. coli) and protozoa (like Giardia). They’re fantastic for treating murky or silty water because they clear out the gunk as they purify.
-
Chemical Treatments: These usually come as little tablets or drops (iodine or chlorine dioxide) that kill bacteria, protozoa, and—importantly—viruses, which a lot of filters can’t remove. They’re incredibly lightweight and compact, making them a perfect backup. The main trade-offs are the wait time, which can be anywhere from 30 minutes to 4 hours, and a potential chemical aftertaste.
-
UV Sterilizers: Gadgets like the SteriPEN use ultraviolet light to scramble the DNA of microorganisms, rendering them totally harmless. They're crazy fast, treating a liter of water in about 90 seconds. The catch? They need batteries and only work in clear water, since sediment can block the UV rays from doing their job.
On-the-Trail Purification in Action
Let's walk through a real-world scenario. You're on day three of a trek, and your main water supply is getting low. You come across a clear, flowing creek—a perfect spot to refill.
This is where having a solid system makes all the difference. Your HYDAWAY 25oz collapsible bottle is almost empty, but its wide mouth makes it a breeze to scoop water directly from the stream.
Here’s how simple the process is with a squeeze filter:
- Unscrew the filter from its dirty water pouch.
- Fill your HYDAWAY bottle from the creek, trying not to stir up too much silt from the bottom.
- Screw the filter directly onto the threads of your HYDAWAY bottle.
- Just flip it over and squeeze. Safe, purified water flows right out, ready to drink immediately.
This method is quick, efficient, and lets you drink straight from your bottle without ever contaminating it. The HYDAWAY bottle’s flexible design is practically made for the squeezing action of a filter, creating a seamless setup right on the trail.
The smartest strategy is often a combo approach. I carry a primary filter for daily use and always keep a small vial of chemical tablets in my first-aid kit. It’s a lightweight, foolproof backup in case my filter clogs or fails.
Finding Reliable Refill Sources
While purifying from natural sources is a core backcountry skill, it's also smart to know where you can find treated water. This saves wear and tear on your filter and gives you a solid backup plan.
Before you even leave, check your maps and campground info for designated water spigots or ranger stations. Many established trailheads and campgrounds offer reliable, potable water. National parks like Yosemite and Zion, for example, have refill stations clearly marked on their park maps, making it easy to top off between long stretches.
When you do find a treated source, take full advantage. Fill up everything—your main reservoirs and personal bottles. This is another moment where HYDAWAY collapsible bottles are a game-changer. You can start your trip with them compressed and empty, then expand and fill them at the last reliable spigot near the trailhead. It’s a simple trick to save space and weight at the start of your journey while ensuring you have max capacity when you need it most.
How to Properly Clean and Store Your Gear
Think of your water containers as a direct investment in your health and safety out on the trail. Just like any good gear, they need a little TLC to last. If you neglect cleaning your camping water storage, you're rolling out the welcome mat for mold, mildew, and bacteria—gross stuff that can wreck your gear and make you sick.
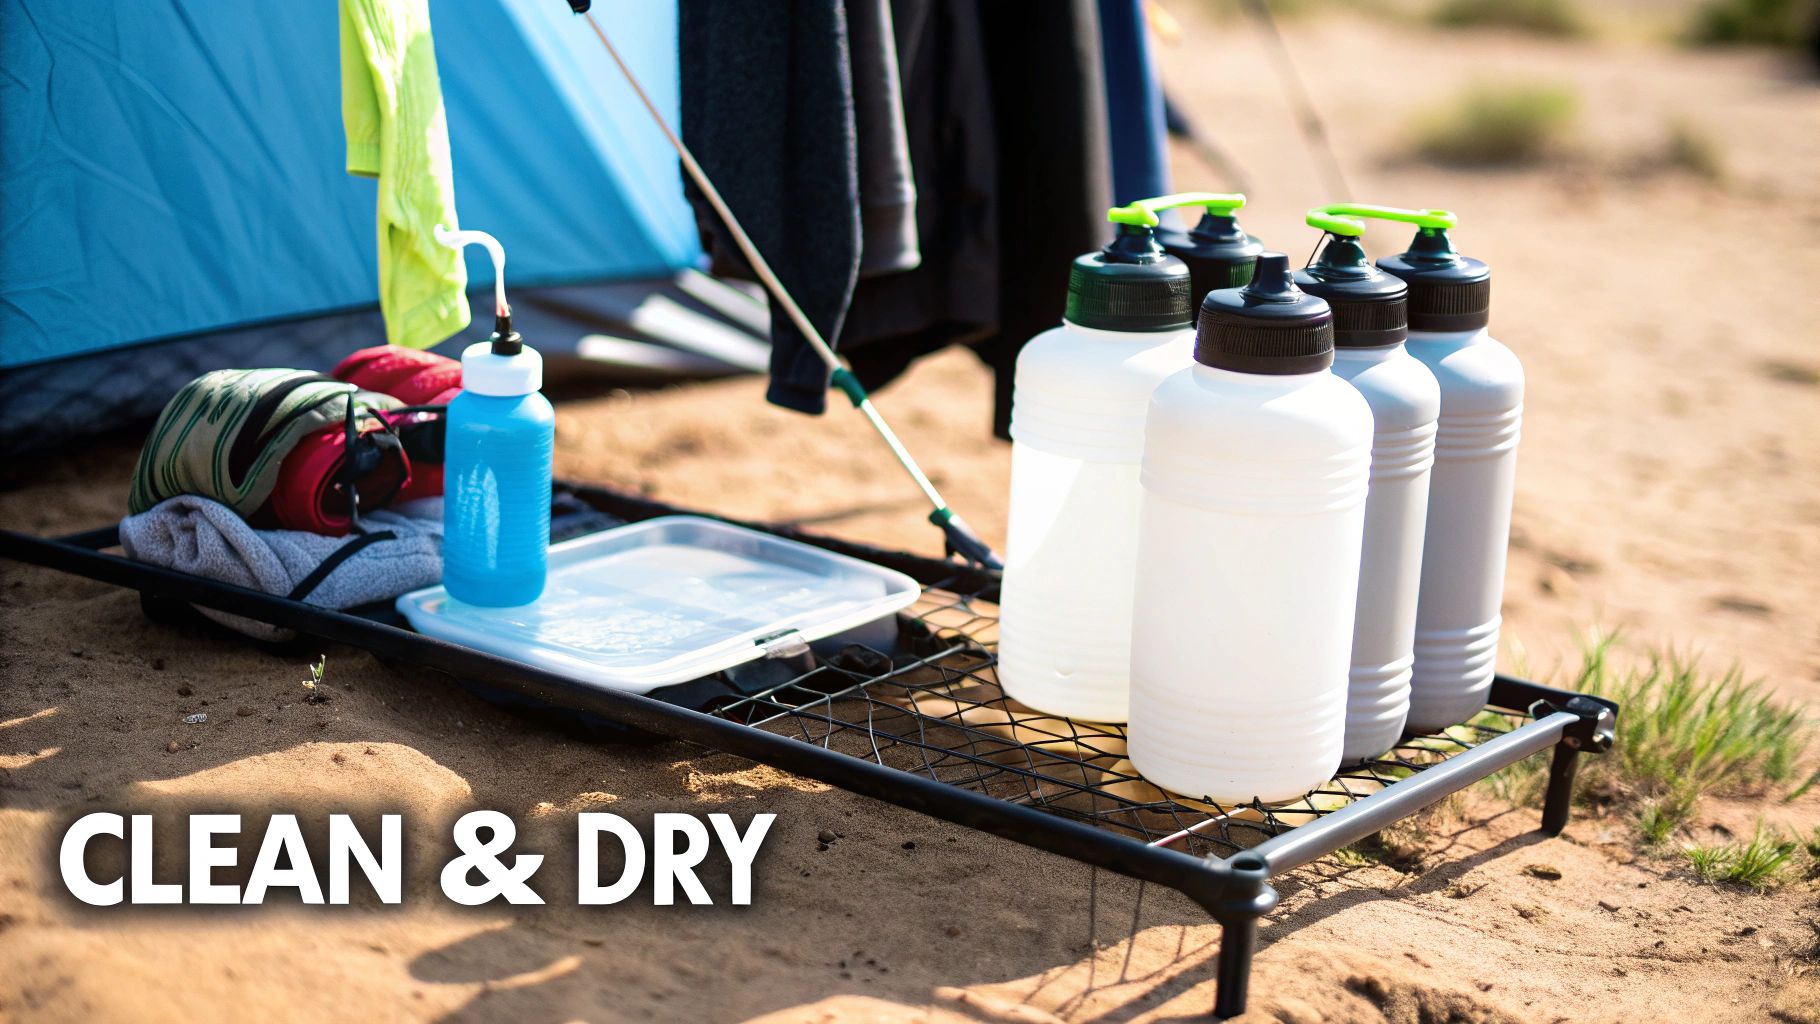
The easiest way to keep everything in top shape is to have a solid post-trip routine. It doesn't need to be some complicated ritual. A few simple steps will guarantee your gear is fresh, safe, and ready for the next adventure. The golden rule? Make sure everything is bone dry before you pack it away.
Your Essential Post-Trip Cleaning Routine
After every trip, give your containers a good wash and sanitization. It’s pretty straightforward.
- Wash It Out: First, take apart your bottles, jugs, and bladders. Get in there with warm, soapy water. For those tricky spots like hydration bladder tubes, a specialized cleaning kit is a real lifesaver. We have a whole guide on using a hydration bladder cleaning kit if you need more details.
- Rinse Well: Make sure every last bit of soap is gone. Nobody wants their next gulp of fresh mountain water to taste like dish soap.
- Sanitize for Safety: Mix up a solution of one teaspoon of unscented household bleach per gallon of water. Let that sit inside your containers for about 5-15 minutes, then give them another thorough rinse. If bleach isn't your thing, specialized cleaning tablets are an awesome, pre-measured alternative.
- Dry, Dry, Dry: I can't stress this enough—it's the most critical step. Hang your bottles, bladders, and tubes upside down and let them air dry completely. A clean cloth can help with any stubborn moisture.
If you're wary of using bleach, there are other great ways to get the job done. You can learn how to disinfect without bleach using methods that are just as effective but a bit more gentle.
Making Maintenance Effortless with HYDAWAY
This whole process is so much easier when your gear is designed for it. HYDAWAY collapsible bottles, for instance, are built for convenience from the trail to the kitchen sink. Their wide-mouth opening means you can actually reach every corner, and they're dishwasher-safe (top rack only!), so you can just let the machine do the hard work. For a practical example, after a dusty weekend camping trip, instead of spending time scrubbing, you can simply expand your HYDAWAY bottle, pop it on the top rack of your dishwasher, and it comes out perfectly clean and ready for your next adventure—or your daily commute.
Pro Tip: When it's time for long-term storage (like over the winter), leave the lids of your containers a little loose. This lets air circulate, which is the best defense against any sneaky moisture trying to start a mildew party.
This one small habit ensures that when you pull your gear out for the first trip of the season, it’s as fresh as the day you put it away. By taking these few simple steps, you're not just protecting your gear—you're making sure every sip of water on your next adventure is a safe one.
Got Questions About Camping Water Storage? We've Got Answers
When you're sorting out your water situation for a camping trip, a few questions always seem to come up. Let's tackle the most common ones so you can pack with confidence.
How Long Can I Safely Store Water?
In a perfect world—a clean, sealed, BPA-free container stashed in a cool, dark spot—water is good for up to six months. But let's be real, for camping, it’s always best to start with a fresh supply right before you leave.
If you take a sip and the water tastes or smells a bit stale, don't risk it. It's time to treat it or find a new source. Trust your senses on this one.
What Is the Best Way to Keep Water From Freezing?
Ah, the classic cold-weather challenge. To keep your water from turning into a solid block, an insulated container is your best friend. No insulation? No problem. Just wrap your bottle deep inside your pack, cushioned by extra layers of clothing.
At night, the best trick in the book is to bring your water bottle into your sleeping bag with you. If you're using a hydration bladder, remember to blow the water back into the reservoir after you drink. This clears the tube, which is always the first part to freeze solid.
Can I put hot drinks in my water bottle? That really depends on the bottle. Most standard plastic or collapsible containers, including HYDAWAY bottles, aren't built for boiling liquids. Always check the manufacturer's temperature rating first and save the piping hot coffee for a dedicated insulated mug.
Ready to build a smarter, more flexible hydration system? Check out the full line of space-saving, adventure-ready gear from HYDAWAY and see how our collapsible bottles can free up room in your pack. Explore our collection at https://myhydaway.com.


