A Complete Guide to Your Hydration Bladder Cleaning Kit

A good hydration bladder cleaning kit is your first line of defense against the invisible gunk that can ruin your water and your expensive gear. These kits aren't just a nice-to-have; they come with specialized brushes and drying tools designed to scrub every last corner of your reservoir, hose, and bite valve.
Without one, you're pretty much rolling out the welcome mat for mold and bacteria on your next adventure, whether you're training for a half-marathon or just trying to stay hydrated at a summer music festival.
The Real Reason Your Water Tastes Funky
Ever take a big swig from your hydration pack midway through a hike, only to be hit with that weird, plasticky taste? That's not just the bladder material "breaking in." It's a warning sign.
The real culprit is usually an invisible layer of buildup called biofilm.
This slimy stuff is basically a party of microorganisms that gloms onto the inside surfaces of your bladder and hose. It absolutely thrives in damp, dark environments—which is the exact definition of a hydration pack stored between trips. This is why even with top-notch, easy-to-clean gear like HYDAWAY’s collapsible bottles, you can't skip regular maintenance. A proper cleaning kit is non-negotiable for keeping that gunk from taking over your entire hydration system.
Why a Simple Rinse Just Won’t Cut It
Just swishing some water around might get rid of loose dirt, but it does next to nothing against established biofilm. Think of it like trying to clean a smoothie out of your HYDAWAY bottle with just a quick splash of water; you wouldn't trust that it's actually clean, right? This is where the tools in a cleaning kit become absolutely essential.
The brushes are designed to physically scrub away that stubborn film, while the drying hangers ensure it doesn't just grow right back. Neglecting this crucial step can lead to some pretty nasty outcomes:
- Funky Tastes & Smells: The most obvious and immediate problem.
- Mold Growth: Nasty black or green spots that can be seriously harmful if you drink them.
- Shorter Gear Lifespan: That buildup can degrade the materials over time and clog up your bite valve for good.
This isn't just a rare occurrence; it’s a massive issue for outdoor enthusiasts. In fact, the global market for these cleaning kits hit USD 226.4 million in 2024, all because people are realizing that clean water on the trail is critical. When industry surveys show that a whopping 70% of bladder users report dealing with mold without a regular cleaning routine, it's pretty clear this is a step you can't afford to miss. You can dig into the market's growth and what it means for adventurers over on dataintelo.com.
Key Takeaway: That "off" taste is your gear's first warning sign. It's telling you that biofilm and bacteria have moved in, and a deep clean is long overdue to protect your health and your gear investment.
A Practical Look at Each Cleaning Tool
Opening up a hydration bladder cleaning kit for the first time can feel a little intimidating. You're met with a collection of specialized brushes and hangers, each with a very specific job. Learning to use them right is the key to a truly clean reservoir—the kind that doesn't secretly harbor gunk in its corners.
Let's walk through what each of these tools does and how to use it like you’ve been doing this for years. And remember, these kits aren't just for your main bladder. The brushes are also fantastic for getting into the nooks and crannies of your HYDAWAY collapsible bottles, especially around the spout and lid threads. Think of it as a cleaning station for all your packable gear.
The Large Bladder Brush
The biggest brush in the kit is your main workhorse. Its job is to get in there and physically scrub away the invisible biofilm that builds up inside the main reservoir. This isn't your average kitchen sponge; its bristles are tough enough to break up grime but gentle enough to avoid scratching or damaging the bladder’s delicate lining.
When you get to scrubbing, don't just give it a quick swish. You want to be methodical. Go over the entire inner surface, giving extra attention to the corners and seams where moisture and sticky residue love to collect. This is what separates a simple rinse from a true deep clean.
The Long, Flexible Hose Brush
This tool might look like a simple pipe cleaner on a long wire, but it’s probably the most important piece in the entire kit. Your drinking tube is a perfect breeding ground for mold—it’s narrow, dark, and notoriously difficult to dry out completely. Just flushing it with water isn’t going to cut it.
For the best results, disconnect the hose from the bladder. Feed the brush all the way through from one end and pull it out the other. Do this a few times, back and forth. Honestly, the first time you do this, you might be a little grossed out by what comes out. But it's a vital step for making sure every sip of water is fresh and clean.
The Small Bite Valve Brush
The bite valve is where your mouth meets the bladder, yet it’s the part we often forget to clean. That tiny brush is designed specifically to get into the small, intricate parts of the valve mechanism and its silicone sheath. Gunk builds up in there fast, which can mess with water flow and just be plain unhygienic.
Take your bite valve apart as much as the manufacturer recommends. Then, use this little brush with some soapy water to give every single component a good scrub. This gets rid of that sticky feeling and helps the valve seal properly, without any leftover taste from your last electrolyte drink.
A complete cleaning routine involves more than just scrubbing. Pairing these brushes with an effective cleaning agent, like specialized tablets, can make a huge difference in eliminating stubborn odors and tastes. You can dive deeper into how cleaning tablets work in our detailed guide.
The Essential Drying Hanger
Finally, let's talk about the unsung hero of every hydration bladder cleaning kit: the drying hanger. After all that washing, any moisture left trapped inside will undo all your hard work in a heartbeat. This simple device is designed to hold the bladder wide open, creating maximum airflow so it can dry completely.
Some hangers are basic frames, while others come with extra clips for the hose and bite valve pieces. Whatever the design, using it is non-negotiable. Sure, you can prop your bladder open with a spatula in a pinch, but a dedicated hanger is way more effective. It guarantees a bone-dry finish, stopping mold and mildew before they even get a chance to start.
Your Definitive Bladder Cleaning Process
Okay, you've got the tools. Now, let's put that hydration bladder cleaning kit to work.
This whole process is pretty straightforward, but the trick is to be methodical. You want to make sure every single part of your system—from the reservoir itself all the way to the tip of the bite valve—is genuinely clean. We'll go through a full cleaning cycle that's easy enough to do just about anywhere, even at a rustic campsite with minimal fuss.
Think about it this way: you just finished a long trail run where you fueled with a sugary electrolyte mix. That sugar residue is a feast for bacteria, so a deep clean is non-negotiable before you pack your gear away. A few simple steps will get your bladder reset and ready for the next training session.
First, Mix Up Your Cleaning Solution
Before you start scrubbing, you need a cleaning agent. You’ve got a couple of solid options here.
- Cleaning Tablets: Honestly, these are the easiest route. Just drop one into your bladder, fill it with warm water, and let it do its thing. Be sure not to use boiling water, as extreme heat can damage the bladder's seams. Just follow the package directions for how long to let it sit.
- DIY Mixture: No tablets? No problem. A simple homemade solution works just as well. Add two tablespoons of baking soda to your reservoir, then fill it about halfway with warm water. Give it a good shake for about 30 seconds to get the powder dissolved. If you're dealing with some stubborn odors, a quarter cup of lemon juice in a liter of water is another great option.
Whichever you choose, let the solution sit in the reservoir for at least 15-20 minutes. This gives it time to break down any gunk or buildup.
Time to Scrub the Reservoir and Components
Once the solution has had a chance to work its magic, it's time to scrub. Pour out most of the liquid, but leave just a little bit in there to help with the cleaning process.
Grab your large bladder brush and give the entire inside of the reservoir a thorough scrubbing. Really pay attention to the corners and seams—that’s where residue loves to hide out. After you're done with the main body, disconnect the hose and bite valve.
Next, take the long, flexible hose brush and run it back and forth through the tube several times. Finally, use the small brush to get into all the little nooks and crannies of the bite valve.
This visual breaks down which tool is meant for each part of the job.
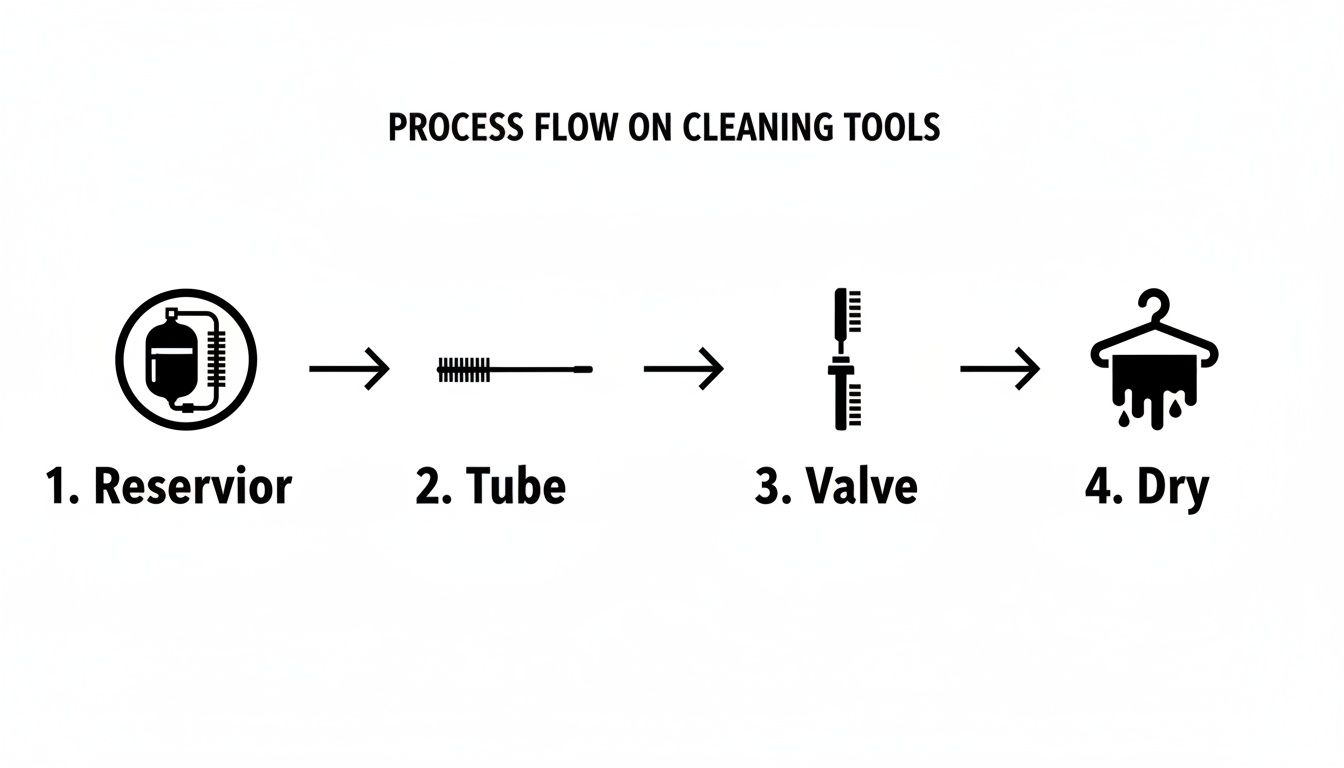
It's a great little guide showing how each specialized brush is designed for a specific component, making sure nothing gets missed.
The All-Important Rinse and Dry
You're almost there, but don't rush this last part. A poor rinse will leave your water tasting like soap or baking soda on your next trip, and nobody wants that.
Rinse the reservoir with fresh water at least three or four times, shaking it well each time. Flush clean water through the hose and bite valve until you're positive all the cleaning solution is gone. Squeeze the bite valve a few times while rinsing to clear out any trapped liquid.
Pro Tip: Don't let your kit gather dust between bladder cleanings. The same brushes are perfect for other gear, too. That large brush, for instance, is one of the best tools for cleaning HYDAWAY collapsible bottles. Check out our bottle brush details to see just how versatile these tools can be for your whole hydration setup.
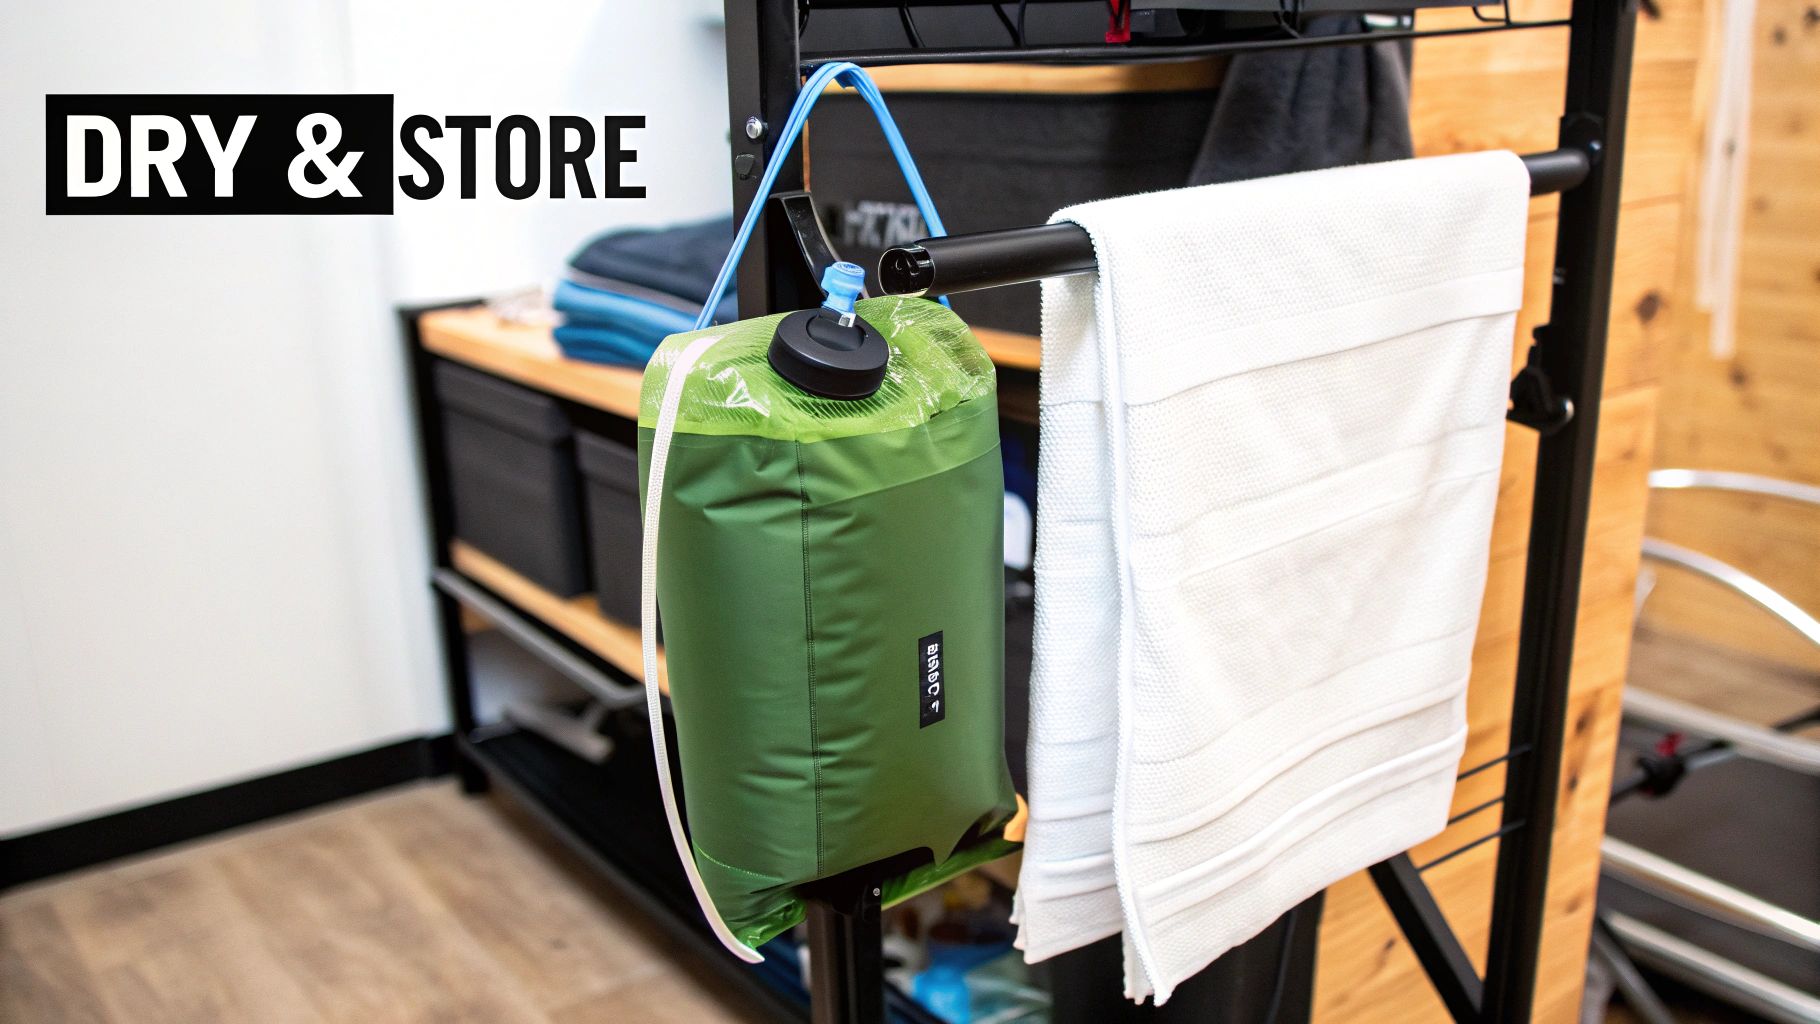
Finally, hang everything up to dry using the kit's hanger. This clever tool is designed to prop the bladder open, allowing maximum airflow to get it completely dry. A bone-dry bladder is your best defense against mold and mildew, ensuring your gear is fresh and ready to go when you are.
Pro Tips for Maintenance and Storage
Mastering the cleaning process is a huge win, but the real secret to long-lasting gear lies in the small habits you build around maintenance and storage. Consistently caring for your bladder ensures it’s always ready for your next adventure, whether you’re a daily commuter or a once-a-year camper.
These habits prevent the slow creep of grime and extend the life of your equipment, which aligns perfectly with HYDAWAY’s philosophy of durable, reusable gear. For example, after a day trip, simply rinsing and thoroughly drying your gear ensures it’s ready for the next spontaneous outing, keeping your water fresh and your bladder in top condition for years.
How Often Should You Clean It?
The simple answer? It really depends on what you’re putting in it. Your cleaning schedule should adapt to what you fill your bladder with.
- For Sugary Drinks: If you use electrolyte powders, sports drinks, or anything with sugar, you absolutely must clean your bladder after every single use. No exceptions. Sugar is a buffet for mold and bacteria, and any leftover residue will kickstart their growth almost immediately.
- For Plain Water: If you’re a water-only purist, you can be a bit more relaxed. A deep clean with your hydration bladder cleaning kit every few weeks is usually sufficient, as long as you thoroughly rinse and dry it after each outing.
Beyond just the bladder, understanding how to maintain your entire hydration system is key. For runners, there's great advice on maintaining your running hydration vest to keep the whole setup pristine.
With over 60 million outdoor enthusiasts in the U.S. alone, proper hygiene is a massive deal. It’s a bit gross, but an uncleaned bladder can harbor 10,000 times more bacteria than a toilet seat after just one week. That's a powerful motivator to keep things clean.
The Critical Importance of Proper Drying
If there’s one step you can’t afford to skip, it’s drying. Trapped moisture is the number one cause of that funky, musty smell and the dreaded mold growth.
The drying hanger included in most kits is your best friend here. It’s designed to prop the reservoir open, allowing air to circulate into every last corner. No hanger? No problem. Get creative! A rolled-up paper towel, a kitchen whisk, or even a small spatula can work in a pinch to keep the bladder open while it air-dries completely. For a visual guide, check out our easy-to-follow cleaning videos to see this process in action.
Pro Tip for Long-Term Storage: Once your bladder is completely clean and bone-dry, toss it in the freezer. This is a game-changer. It prevents any residual, microscopic bacteria from throwing a party between your trips, keeping your gear fresh and ready to go, even if it sits for months.
This simple trick ensures that when you pull out your gear for that annual camping trip or a spontaneous weekend hike, it's as fresh as the day you cleaned it.
Troubleshooting Common Bladder Problems
Even if you follow your cleaning routine to the letter, you might still hit a few snags with your hydration bladder. It happens. From a weird taste that just won't go away to a frustratingly slow trickle of water when you're parched, most issues are a pretty simple fix.
Imagine this: you're trying to keep the whole family hydrated on a sweltering day at a theme park. Halfway through the afternoon, your youngest complains the water tastes "weird." The heat has kicked bacterial growth into overdrive, creating that funky plastic flavor. Back at the hotel, a quick fix is all it takes to get that bladder fresh for another day of adventure.
Getting Rid of That Stubborn Plastic Taste
That lingering chemical or plastic taste is probably the number one complaint I hear. It’s usually caused by biofilm, a sneaky layer of gunk you can't even see. The good news is, you've got a few powerful, non-toxic weapons in your arsenal.
- Lemon Juice Power: The natural acidity in lemon juice is a champ at neutralizing odors and tastes. Just fill your bladder with warm water and squeeze in about a quarter cup of lemon juice. Let it hang out for at least an hour before giving it a good scrub and a thorough rinse.
- Cleaning Tablets: These are literally made for this exact problem. They fizz up, helping to break down residue in all those nooks and crannies. Drop one in, add water, and let it do its thing. Easy peasy.
- Baking Soda Soak: For a dead-simple solution, mix two tablespoons of baking soda into a bladder full of warm water. Shake it up really well and let it sit overnight for the best results.
Tackling Lingering Mildew Spots
Finding little dark spots in your bladder is definitely unnerving, but don't toss it just yet. If you've only got a few minor spots, you can usually handle it.
Start by scrubbing the area directly with a brush from your cleaning kit and a paste made from baking soda and water. If that doesn't cut it, a heavily diluted mix of household bleach and water can work, but—and this is a big but—always check your bladder manufacturer’s guidelines first. Bleach can degrade some materials. If you go this route, you have to rinse it out multiple, multiple times to make sure no bleach is left behind.
If you open your bladder and find widespread mold, it’s time for a new one. It's just not worth risking your health trying to salvage it.
Fixing a Slow Water Flow
Are you sucking for your life just to get a pathetic dribble of water? The culprit is almost always a blockage in the bite valve. Residue from sugary drinks or tiny bits of trail debris can easily clog up those little slits.
The fix is simple: take the bite valve completely apart. Use the small brush from your hydration bladder cleaning kit to scrub every single component, paying special attention to the inside of the silicone sheath and around the valve itself. A good scrub and rinse almost always gets the water flowing freely again. While you're at it, give the bite valve a quick inspection for any tears or damage, as that can also mess with performance.
Choosing the Right Cleaning Kit for You
Not all cleaning kits are created equal. Finding the right one really comes down to your specific needs, your budget, and how you like to travel.
The market for these handy tools is booming right alongside hydration bladders themselves. We're talking about a global market valued at a whopping $2,350.75 million in 2024. That tells you just how many people rely on hands-free hydration for everything from a quick run to a multi-day hike. With a massive user base comes a massive need for solid cleaning solutions—especially when you consider that an estimated 75% of users battle grime in their bladders. You can dig into the numbers yourself over at futuremarketreport.com.
This growth is great news for us, though. It means we have more options than ever when picking out a hydration bladder cleaning kit.
All-in-One Kits vs. Buying Separately
For most people, especially if you're just getting into using hydration packs, an all-in-one kit is the smartest way to go. These bundles usually give you the whole shebang: a large brush for the reservoir, a long skinny one for the hose, a tiny one for the bite valve, and some sort of drying hanger. It's just plain convenient, saves you a few bucks, and makes sure you have every tool you need from the get-go.
Buying pieces separately might make sense if you're a seasoned adventurer who just needs to replace a frayed hose brush. But more often than not, you'll end up spending more in the long run piecing it together. If you're a HYDAWAY user who values efficiency and packability for your travel and daily life, the convenience of a bundled kit is almost always the right call.
Key Features to Look For
When you're comparing kits, it's the little details that can make a huge difference in your cleaning routine.
- Ergonomic Handles: Keep an eye out for brushes with comfortable, non-slip handles. Trust me, it makes scrubbing out a funky bladder much less of a chore.
- Included Cleaning Tablets: Some of the better kits toss in a starter pack of cleaning tablets. These are perfect for hitting the reset button on tough odors or stubborn stains right out of the box.
- Durable Drying Hanger: A flimsy hanger that can't properly support your bladder is just useless. You need something sturdy that holds the reservoir wide open to promote maximum airflow and keep mold from setting up shop.
And if you want to get really nerdy about the science behind sanitizing, understanding what kills viruses on surfaces is a great way to understand how different cleaning agents actually work.
For the Budget-Conscious Traveler If a commercial kit isn't in the cards right now, a DIY approach can work in a pinch. You can pull a piece of string with a small, knotted cloth through the hose, and an old toothbrush can do a decent job on the bite valve. While it's definitely better than doing nothing, a purpose-built kit is worlds more effective at getting rid of that stubborn, invisible biofilm.
A Few Lingering Questions
Even after getting your cleaning routine down, a few questions always seem to pop up. Let's tackle the most common ones so you can keep your gear in prime condition, no guesswork involved.
How Often Should I Really Clean My Bladder?
This is the golden question, and honestly, it all comes down to what you're putting in it.
If you’re a purist who only ever fills up with plain water, you can get away with a deep clean using your hydration bladder cleaning kit every few weeks. The one thing you can't skip, though, is a quick rinse and a thorough dry after every single use. For someone using a HYDAWAY bottle on their daily commute, this simple rinse-and-dry is usually plenty to keep it fresh.
But the moment you add electrolyte powders or sugary sports drinks, the game changes completely. Sugar is basically a welcome mat for bacteria, so you must give it a full, proper clean after every single use. No cutting corners on this one.
Can I Just Toss It in the Dishwasher?
It's tempting, I know. While a lot of modern reservoirs are built tough enough for the top rack of a dishwasher, it’s not the magic bullet you might think it is. First, always double-check the manufacturer’s instructions, because the high heat can sometimes weaken the seams or damage the seals on certain models.
Even if the main bladder is dishwasher-safe, the hose and bite valve almost never are. A dishwasher's spray just can't get deep inside that long tube or into all the tiny nooks and crannies of the valve. This is where those specialized brushes in your cleaning kit become absolutely essential for a truly sanitary clean.
Your best bet is always to hand-wash all the components. It’s the only way to ensure every single part gets scrubbed, rinsed, and properly cared for. This not only extends the life of your gear but guarantees your water will always taste fresh.
What Are Some Safe DIY Cleaning Solutions?
Caught without your cleaning tablets? No sweat. Your kitchen pantry probably has everything you need to get the job done.
- Baking Soda: Mix a couple of tablespoons into warm water. It's a fantastic, all-natural cleaner that’s great at knocking out funky odors.
- Lemon Juice: A quarter cup of lemon juice mixed into a liter of water works wonders for neutralizing that stubborn plastic taste some new bladders have.
- Mild Dish Soap: For a general scrub-down, a few drops of a simple, unscented dish soap will do the trick just fine.
The most important step here is to rinse, rinse, and then rinse again. You want to be absolutely sure you've washed away any potential aftertaste.
Ready to make every adventure fresher and healthier? Having the right gear makes all the difference. Check out HYDAWAY's collection of innovative, packable hydration solutions and accessories, all designed for a life on the go. Shop now at myhydaway.com and see just how easy it is to stay hydrated anywhere your travels take you.


