


Water Bottles for Mountain Bikes: Your 2026 Buyer's Guide

You know the feeling. You're halfway down a rough descent, the bike is moving around underneath you, and then you hear it. That hollow rattle of a bottle leaving the cage and bouncing into the brush. Or you reach for a drink on a long climb and get one dry, useless sip because you underestimated the day.
That's why I don't treat hydration as a bottle choice anymore. I treat it as a system. The right setup depends on your frame, your ride length, how technical the terrain is, and whether you like drinking from the bike, a hip pack, or a backpack. Water bottles for mountain bikes aren't just about capacity. They affect how you ride, how much gear you can carry, and how calm you stay when the ride stops going to plan.
Modern mountain bikes made this more complicated, not less. Full-suspension frames, compact front triangles, side-entry cages, hip packs, insulated bottles, collapsible backup bottles. They all solve different problems. Some work beautifully together. Some look good in the garage and get annoying fast on trail.
Why Your MTB Hydration Strategy Matters
A lot of riders still frame hydration as a simple choice between a bottle and a pack. That misses what happens on trail. The core question is how your hydration setup behaves when the ride gets rough, hot, longer than expected, or more technical than the map suggested.
On a short after-work lap, a single bottle might be enough if your bike can carry it securely and you can reach it without fighting the frame. On an all-day ride, that same setup can turn into a weak point fast. If you're relying on one bottle and it ejects, leaks, or gets buried behind a cramped shock mount, your whole day changes.
Hydration is part of your bike setup
I look at hydration the same way I look at tires or tools. It has to match the ride.
If you're on a hardtail with a roomy front triangle, bottle access is usually straightforward. If you're on a modern full-suspension bike, the frame itself may decide what's realistic. Some bikes accept one bottle cleanly. Some need a side-entry cage. Some force you into a mixed system with on-bike water plus a hip pack or pack.
Practical rule: Build your hydration setup around the bike first, then around capacity.
That matters because bad hydration setups fail in predictable ways:
- Bottle ejection on rough terrain when the cage is too loose for real trail chatter
- Poor access when a shock, linkage, or frame bag blocks a clean pull
- Overheating when a big pack solves capacity but makes your back run hot
- Wasted space when rigid bottles stay bulky even after you've finished drinking
The goal is consistency, not just carrying water
The best setup is the one you'll use every ride. It should let you drink often, refill easily, and adapt to changing plans. That's especially true right now, when many riders are mixing trail rides with road transfers, shuttle days, van trips, and longer backcountry loops.
A strong hydration system gives you margin. That margin matters when the trail takes longer, the weather gets warmer, or the nearest refill is farther away than you thought.
Choosing Your Hydration System
Halfway through a rocky climb is a bad time to learn your hydration setup doesn't fit your bike. On a hardtail, that usually means a missed bottle grab. On a modern full-suspension frame, it can mean you never had realistic bottle access in the first place. That is why I treat hydration as a system. You choose for frame space, ride length, refill options, and how often you want water within reach.

Three setups cover most mountain bike use: rigid bottles, collapsible bottles, and hydration packs. The right answer often includes more than one. A short after-work loop may only need a bottle in the frame. A longer ride on a cramped full-suspension bike may work better with one on-bike bottle plus extra water in a hip pack or small pack.
What rigid bottles still do well
Rigid bottles are still the easiest option for fast access. They work well for short and medium rides, especially when your frame gives you enough clearance for a clean pull and reinsert. If you race, ride hard, or prefer to keep your back free, a standard bottle-and-cage setup is still hard to beat.
Their weakness is fixed bulk. After you drink the water, the bottle still takes up the same space on the bike, in a pack, or in the van. That matters less on a one-hour ride and more on rides where your storage needs change during the day.
Where collapsible bottles earn a place
Collapsible bottles help when your water needs are flexible but your storage space is tight. I like them as a secondary reservoir for long rides, as a refill bottle stashed in a hip pack, and for travel days when gear gets shuffled between the bike, car, and pack. They are also useful on full-suspension bikes that can only carry one bottle on the frame, but still need extra capacity for a hot day or a route with long gaps between water stops.
The trade-off is usability while riding. Some collapsible designs are better in a jersey pocket, cargo pocket, or pack than in a cage, and one-handed drinking can be less tidy on rough trail. Used in the right role, though, they solve a problem rigid bottles cannot. They stop taking up so much room once they are empty.
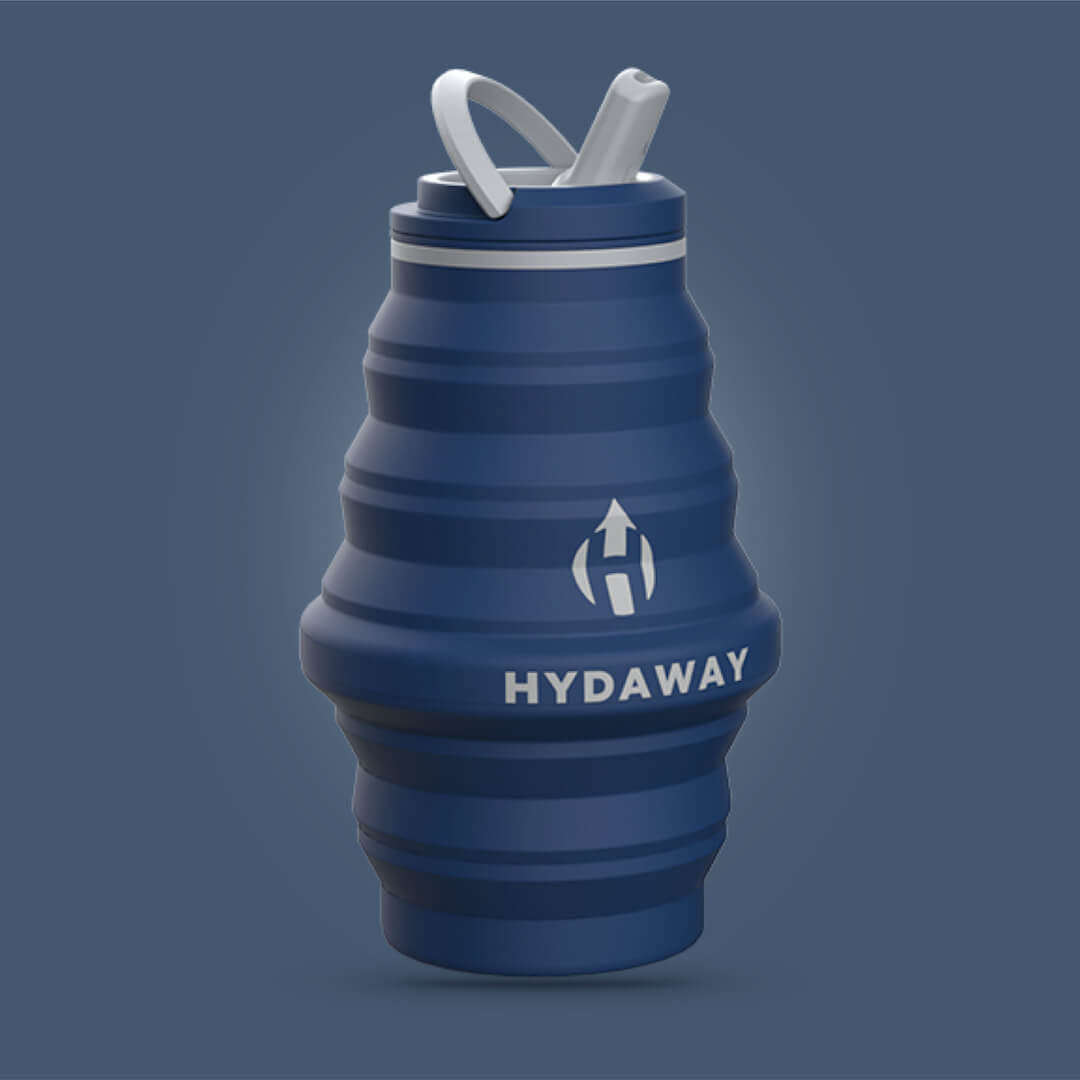
HYDAWAY fits that use case well. It makes sense for riders who want backup water without giving permanent space to a second rigid bottle. If you are comparing bottle-plus-pack combinations, HYDAWAY's guide to building an outdoor hydration pack system is a practical place to start.
Why packs still matter
Hydration packs carry the most water with the fewest frame-fit headaches. They are often the cleanest answer for long rides, hot weather, and bikes with very limited bottle room. A hose also makes drinking more frequent for many riders, which is useful on sustained climbs and rough descents where grabbing a bottle is awkward.
The cost is comfort and maintenance. Packs trap heat, add weight to your body instead of the bike, and take more cleaning than a bottle. Riders often end up carrying extra gear just because the space is there.
| Attribute | Rigid Bottle | Collapsible Bottle | Hydration Pack |
|---|---|---|---|
| On-bike access | Excellent when cage fit is good | Usually better in a pocket or pack than a cage | Hands-free drinking |
| Packability when empty | Poor | Excellent | Poor to moderate |
| Cleaning ease | Usually simple | Can take more attention | Most involved |
| Best use case | Short to medium rides | Backup capacity, travel, bikepacking | Long rides and limited frame space |
| Main compromise | Fixed bulk after use | One-handed use can vary | Heat and cleaning |
A strong setup usually mixes strengths instead of chasing one perfect product. One bottle on the bike, one collapsible backup in a pocket, or a pack for big days can all be the right call. The best system is the one that fits your frame and keeps water easy to reach for the kind of rides you typically do.
Key Features to Evaluate in a Bike Bottle
A bottle can look perfect online and still be annoying on trail. The details that matter most are the ones you notice when you're breathing hard, wearing gloves, and trying to drink over rough ground.

Cap design and trail usability
Start with the nozzle and cap. In 2026, mountain bikers are projected to prioritize leak-proof hydration systems with self-sealing caps, and a top-rated feature is a “handy self-sealing cap” that eliminates the need to squeeze or suck, helping water flow only when intended, according to Bike Perfect's MTB bottle roundup.
That matters more off-road than it does on pavement. A cap that dribbles in the garage becomes a mess in a hip pack. A valve that needs too much effort becomes one more thing you avoid using during a hard climb.
When I'm looking at water bottles for mountain bikes, I want these basics:
- Leak resistance: It should stay sealed when the bike gets knocked around.
- Easy open-close behavior: Gloves, cold fingers, and trail dust expose bad cap designs fast.
- Predictable flow: You shouldn't have to guess how hard to squeeze or bite.
If you want a simple reference point outside the MTB category, the Swift Running water bottle is useful to compare for basic handheld priorities like grip, size, and drinking feel. The context is different, but the same idea applies: a bottle only works if drinking from it feels easy.
Materials and taste
Material affects more than weight. It changes taste, flexibility, grip, and how the bottle ages. For trail riding, I prefer materials that don't leave a plastic aftertaste and don't get sketchy after repeated heat and sun exposure.
Food-grade silicone and other verified safer materials matter most for riders who leave bottles in cars, on racks, or in direct sun during shuttle days. A bottle can be durable and still be unpleasant to drink from. That's not a small issue if it makes you drink less.
For broader bottle comparisons and category breakdowns, HYDAWAY's article on the best water bottles for biking is a practical companion if you're deciding between daily-use and ride-specific options.
Insulation and real summer value
Insulation is worth paying attention to if you ride in heat. Cold water stays more appealing, which usually means you drink more consistently. That's one of those small quality-of-life upgrades that matters more on the fifth hot ride than it does on the first.
A bottle doesn't need to be heavily insulated for every ride. But if you often start in warm weather, park in the sun, or spend long stretches climbing with no refill option, insulation can be a meaningful comfort upgrade.
A quick visual walkthrough helps if you're comparing shape, cap layout, and cage interaction:
Check the bottle with your actual gloves on. That simple test catches a lot of bad cap designs before they ruin a ride.
Solving Mounting and Fit Challenges on Modern Bikes
Bottle choice is only half the problem. The other half is whether the bike will carry it cleanly. Modern mountain bikes often have shorter front triangles, lower shocks, piggyback reservoirs, storage doors, and frame shapes that make traditional cage placement awkward.
A frequently asked question is how to carry hydration on full-suspension mountain bikes without bottle cages being crushed by rear shock movement, yet many guides still don't offer force tolerance or frame-specific clearance data for low-profile side-loading cages, as noted in this discussion of hydration fit issues on full-suspension bikes. That gap is why riders keep improvising.

Full-suspension bikes need a different approach
The biggest mistake riders make is checking fit only at rest. Your bottle might clear the shock in the garage and still become a problem once the suspension compresses through travel.
For full-suspension setups, I use this checklist:
-
Cycle the suspension first
Remove air or compress the rear end safely so you can see the bike at full travel. That tells you whether the bottle, cage, or cap will interfere. -
Choose side-entry when vertical clearance is tight
Side-entry cages often make more sense than top-entry cages on compact frames, especially if the bottle has to move around a shock yoke or frame brace. -
Use smaller bottles when fit is marginal
A bottle that technically fits but rubs under pressure isn't a solution. A smaller bottle plus secondary storage is usually the cleaner move.
Practical mounting options that work
If your frame has limited bosses or poor access, the answer may not be a standard cage at all.
- Alternative boss locations: Some bikes support mounts beyond the obvious downtube spot.
- Strap-on cages: Useful for frames without workable bosses, especially if you want a backup bottle on a less ideal but still usable location.
- Hip pack integration: A small bottle on the bike plus one in a hip pack often rides better than forcing a large bottle into a bad frame fit.
On modern trail bikes, “fits” isn't enough. The bottle has to clear under compression and still be easy to remove while you're tired.
What usually doesn't work
Forcing a tall bottle into a cramped frame rarely stays convenient. The same goes for choosing an ultra-tight cage that secures the bottle but makes extraction a wrestling match. If you can't pull the bottle smoothly with one hand, you won't drink enough when the trail gets technical.
System thinking is helpful. A compact on-bike bottle for frequent sipping and a second bottle elsewhere often beats trying to solve everything with one oversized frame-mounted option.
Matching Your Hydration Setup to Your Ride
The easiest way to choose among water bottles for mountain bikes is to stop thinking in categories and start thinking in ride types. The right setup for a short XC effort is not the right setup for a long trail day or an overnight route.
The cross-country rider
The XC rider usually wants immediate access, low fuss, and minimal weight on the body. That points toward one or two frame-mounted bottles if the bike allows it. If the frame is tight, a compact bottle in a secure cage is usually better than a larger one that's awkward to remove.
This kind of rider benefits most from drinking often and keeping the bike light on the body. A pack can still make sense in heat or on long race courses, but it's usually the backup plan, not the default.
The all-day trail rider
The all-day trail rider has the most moving parts. There's climbing, descending, snack stops, tools, layers, and maybe no reliable refill for a while. For such scenarios, a hybrid setup often wins.
One practical example is an insulated primary bottle on the frame, paired with extra water in a hip pack or pack. That gives you easy access first and reserve capacity second. For summer riding, insulation matters more here. This review of insulated bike bottles notes that double-wall construction can keep beverages cold for hours, even in hot weather, and that some designs maintain 40°F (4°C) water for up to 12 hours. That's especially useful when your first bottle is the one you'll drink from most often.
The bikepacker or multi-day rider
Bikepackers need flexibility more than elegance. Capacity changes throughout the day. Gear shifts around. Food takes space. Empty containers become dead volume unless they pack down.
That's where a mixed system works well. A fixed bottle handles routine drinking. A pack or frame bag carries the rest. A collapsible secondary bottle makes sense because it gives you extra carrying ability when needed and then gets out of the way.
- Morning start: Carry more while water access is uncertain.
- Midday refill: Adjust capacity instead of carrying bulky empties.
- Camp or van setup: Keep one bottle for immediate use and stash another flat when not needed.
The best ride setup changes with duration. Your hydration system should change too.
For riders who travel to ride, that adaptability matters off the bike as much as on it. A bottle that works on trail and then packs flat in a duffel, camper, or airport carry-on solves a real problem that standard rigid bottles never do.
The Strategic Advantage of a Collapsible Bottle
A collapsible bottle isn't automatically the right main bottle for every mountain biker. But it is one of the smartest additions you can make to a broader hydration kit.

The biggest advantage is simple. It gives you optional capacity without forcing you to carry permanent bulk all day. That matters for riders who don't always know how long the ride will run, who stop to refill mid-ride, or who are already tight on storage space.
A key underserved angle in bottle coverage is the lack of hard comparison data around collapsible bottles versus rigid ones for vibration leakage and one-handed use, but packability remains a clear advantage for space-limited riders like bikepackers and van-lifers, as noted in Treeline Review's bike bottle guide. That lines up with what many riders experience in practice. Even when a collapsible bottle isn't the ideal first bottle to drink from on rough singletrack, it can still be the right second bottle to carry.
Where a collapsible bottle makes the most sense
A few use cases stand out:
- Backup water on uncertain rides when you might extend the route
- A separate drink mix bottle so electrolytes don't take over your main water bottle
- Minimalist hip-pack setups where space disappears fast
- Travel and van life where gear needs to pack down between rides
If you want to compare the wider category, HYDAWAY's article on collapsible water bottles is a useful starting point. Another example in the same space is Lumen Botanica's 16oz bottle, which shows the kind of compact form factor that appeals to riders trying to keep spare capacity without dedicating full-time space to it.
What to expect, realistically
There are trade-offs. Some collapsible bottles are slower to handle with one hand. Some are easier to stash than to clean. Some work better in a pack pocket than in a traditional cage.
That's fine. They don't need to replace every rigid bottle. Their value is strategic. They give you a more flexible hydration plan, which is often exactly what mountain biking demands.
Proper Care for a Longer Bottle Lifespan
A mountain bike bottle lives a harder life than a road bottle. It gets sprayed with grit, bounced in the cage, filled one day with plain water and the next with sticky drink mix, then left in a hot car after the ride. If you want your hydration system to stay reliable, bottle care has to be part of the routine.
The biggest mistake is letting residue sit.
Clean it before residue sets
Rinse the bottle soon after the ride, especially if you used carbs or electrolytes. Plain water usually leaves very little behind. Drink mix dries into threads, hides in valves, and starts the bad-taste cycle fast.
Focus on the parts that trap buildup:
- Nozzles and bite valves: Small channels hold residue longer than the bottle body.
- Threads and seals: Grit, dust, and dried mix collect where cap parts meet.
- Corners and folds: Collapsible bottles need extra attention anywhere the material creases.
If a bottle starts smelling off, fix the cause. A fresh fill of flavored drink mix only covers it for one ride.
Drying matters as much as washing
A clean bottle stored wet can still come back sour. Leave the cap off when you can, separate removable parts, and let air get into the bottle before you pack it away.
Store bottles open, not sealed. Trapped moisture causes more bottle funk than visible dirt.
Practical care for mountain bike use
Mountain bikers are rough on hydration gear, and modern setups make that more obvious. Bottles on tight full-suspension frames pick up more grime from the rear wheel. Backup bottles that live in a hip pack or travel bag can stay folded or tucked away long enough to trap moisture if they were packed damp.
A simple rhythm keeps the whole system working:
- After every ride: Rinse and air dry.
- After drink mix use: Wash the bottle and cap parts thoroughly.
- Before longer rides or trips: Check seals, threads, and valves for wear.
- Before storage: Leave everything clean, dry, and unsealed.
That matters even more if you rotate between a frame bottle, a pack bottle, and a collapsible backup. Every piece needs to be ready when the ride changes. A neglected spare is useless when your main bottle runs dry.
If you use packable gear like HYDAWAY as part of that setup, the same rule applies. Clean it well, dry the folds fully, and stash it only when it is ready for the next ride. That keeps your hydration system flexible without turning your backup bottle into the one piece of gear you stop trusting.
If your current setup leaves you short on water, stuck with bulky empties, or fighting for space in a hip pack or travel bag, take a look at HYDAWAY. Their collapsible bottles make the most sense as part of a bigger hydration system for riders who want flexible backup capacity, packable gear for travel, and reusable drinkware that doesn't take over valuable space when the ride is done.