Your Essential Light Backpacking Gear List

A good light backpacking gear list isn't just about collecting a pile of expensive, featherlight items. It’s a whole mindset—one focused on gaining freedom, enjoying more comfort, and covering more ground with way less effort.
Imagine you're packing for a spontaneous weekend trip. You could either lug a heavy checked suitcase full of "just in case" stuff you never touch, or you could pack a single, versatile carry-on that gives you total freedom. We’re aiming for the carry-on approach.
Why Carrying Less Lets You Experience More
Starting a backpacking trip with a heavy pack can feel like a chore. Every step up a steep trail becomes a struggle, your shoulders start to ache, and your focus shifts from the incredible view ahead to the crushing weight on your back.
The idea behind a light backpacking gear list is simple: reduce physical strain to increase your enjoyment. It’s all about intentionally choosing gear that maximizes your freedom out on the trail.
This approach isn't about being uncomfortable or roughing it. Actually, a lighter pack often leads to more comfort. With less weight, you can hike farther without feeling wiped out, set up camp faster, and have more energy to just sit back and soak in the sunset. For a family hiking with kids or a retiree exploring a national park, this means more quality time enjoying the destination and less time recovering from the journey.
Understanding Backpacking Weight Jargon
To start making smarter gear choices, you need to know how experienced hikers talk about weight. It’s pretty simple—everything in your pack can be broken down into three categories.
- Base Weight: This is the core weight of your gear—everything you carry that you don’t eat or drink. Think of your backpack, tent, sleeping bag, and extra clothes. This number stays the same throughout your trip and it’s the main thing we try to shrink.
- Consumables: This is everything you use up along the way, like your food, water, and stove fuel. This weight naturally drops every day you’re on the trail.
- Worn Weight: These are the items you’re actually wearing—your hiking shoes, shorts, shirt, and hat. This weight doesn’t count toward your pack’s base weight.
Making this distinction helps you focus your efforts. For example, you can’t change how much water you need, but you can choose a lighter container for it. This is where smart, packable gear makes a huge difference. The HYDAWAY collapsible bottle is a perfect example of this philosophy in action. It’s a durable 25oz water bottle when you need it for a day hike, but once it's empty, it collapses flat. That saves both weight and, just as importantly, precious space inside your pack when you're heading back to the car.
Finding Your Ideal Weight Class
There are no official rules for what counts as "light," but the backpacking community generally uses a few benchmarks for base weight. Knowing these can help you set a realistic goal for your own gear list.
A lighter pack is a safer pack. When you reduce the stress on your joints and muscles, you significantly lower your risk of slips, falls, and injuries. You stay more alert and capable on the trail.
Here's a general breakdown:
- Traditional Backpacking: Base weight is typically over 30 pounds.
- Lightweight Backpacking: Base weight falls between 15 and 30 pounds.
- Ultralight (UL) Backpacking: Base weight is under 15 pounds.
Your personal goal will depend on your comfort level, the kind of trip you’re planning, and your budget. The key is to start thinking critically about every single item. Ask yourself, "Do I truly need this, and is there a lighter, smarter alternative?" That intentional approach is the first step toward building a gear list that truly empowers your adventures.
Optimizing The Big Four Core Gear Systems
If you want to slash serious pounds from your pack, the fastest way is to focus on the heaviest items you're carrying. In the backpacking world, we call these the "Big Four"—your backpack, shelter, sleeping bag, and sleeping pad. These four pieces of gear are the foundation of your kit, and they're where you'll get the biggest bang for your buck in weight savings.
Think of it like building a house. You wouldn't put a heavy, tiled roof on a flimsy frame, right? It's the same principle here. Once you lighten your Big Four, you can often get away with a much smaller and lighter backpack. This creates a wonderful cascading effect, letting you trim weight across your entire gear list.
This chart gives you a quick visual of how base weights stack up across different backpacking styles. The whole idea is to strategically upgrade your core systems to move from that traditional, heavier setup toward a much more comfortable, lighter one.
As you can see, just a few smart upgrades to these four items can easily bump your base weight from the "Traditional" category down into the "Light" zone. Trust me, your back and knees will thank you for it on the trail.
The Big Four Weight Savings Comparison
To really see the difference, let's break down where the ounces and pounds melt away when you shift from old-school gear to modern, lightweight alternatives. The savings can be dramatic.
| Gear Category | Traditional Weight (Approx.) | Lightweight/Ultralight Weight (Approx.) | Potential Weight Saved |
|---|---|---|---|
| Backpack | 4 - 6 lbs | 1.5 - 2.5 lbs | 2.5 - 3.5 lbs |
| Shelter | 4 - 5 lbs | 1 - 2 lbs | 3 - 4 lbs |
| Sleeping Bag | 3 - 4 lbs | 1 - 2 lbs | 2 lbs |
| Sleeping Pad | 1.5 - 2.5 lbs | 12 oz - 1.5 lbs | 0.5 - 1 lbs |
Looking at these numbers, it’s clear how swapping out just these core items can lead to a pack that’s 8-10 pounds lighter before you even add food and water. That's a game-changer for your hiking endurance and overall enjoyment.
Choosing Your Backpack: The Core of Your System
Backpacks have come a long, long way thanks to incredible new materials and smarter designs. For most people, the choice boils down to a framed pack versus a frameless one.
- Framed Packs: These give you more support and are the way to go if you’re carrying loads over 20-25 pounds. Many modern packs use ultralight carbon fiber frames to spread the weight across your hips and shoulders without adding much heft themselves. For example, popular current models from brands like Osprey and ULA Equipment offer excellent support under two and a half pounds.
- Frameless Packs: Much simpler and lighter, these are best for seasoned hikers with base weights under 15 pounds. They require you to pack carefully, often using your sleeping pad or other gear to create a makeshift internal frame for support.
Selecting a Shelter: Tent vs. Tarp
Your shelter is your home away from home, but it doesn't have to weigh a ton. The main debate here is between a classic freestanding tent and a non-freestanding shelter that cleverly uses your trekking poles for support.
A common mistake is packing way more shelter than you need. A standard two-person freestanding tent can easily top four pounds, while an ultralight shelter for one person can weigh less than a pound.
Freestanding tents are a breeze to set up anywhere, but you pay for that convenience with the extra weight of dedicated poles. On the other hand, trekking pole tents and tarps are lighter and incredibly versatile, though they do take a bit of practice to pitch perfectly. If you're really aiming to go ultralight, learning some solid tarp tips for maximizing your shelter can be a total game-changer for your pack weight.
Your Sleep System: Bag and Pad
A good night's sleep is non-negotiable for recovery on the trail, but your sleeping bag and pad can be two of the bulkiest, heaviest items in your pack.
- Sleeping Bag vs. Quilt: Quilts have become a huge favorite in the ultralight community. By ditching the zipper and the insulation on the bottom (which just gets crushed and becomes useless under you anyway), quilts can easily save you a pound or more compared to a traditional mummy bag. Brands like Enlightened Equipment and Katabatic Gear are leading the charge here.
- Sleeping Pads: Inflatable air pads give you the best comfort for their weight. However, don't overlook closed-cell foam pads—they’re cheaper, virtually indestructible, and can pull double duty as a sit pad or even part of your pack's frame.
And remember, every single thing you carry contributes to the total weight and volume, right down to your water bottles. Making smart choices on smaller items adds up. Take a look at our guide on choosing a lightweight backpacking water bottle to see how even the little things can be optimized for a lighter, more enjoyable trip.
Once you’ve wrestled your Big Four into shape, the camp kitchen is the next big place to shed serious weight and bulk. You can't skimp on food and water, of course, but the gear you use to prep, eat, and carry them is ripe with opportunity for getting leaner. This is where smart, multipurpose, and packable items become your best friends on the trail.
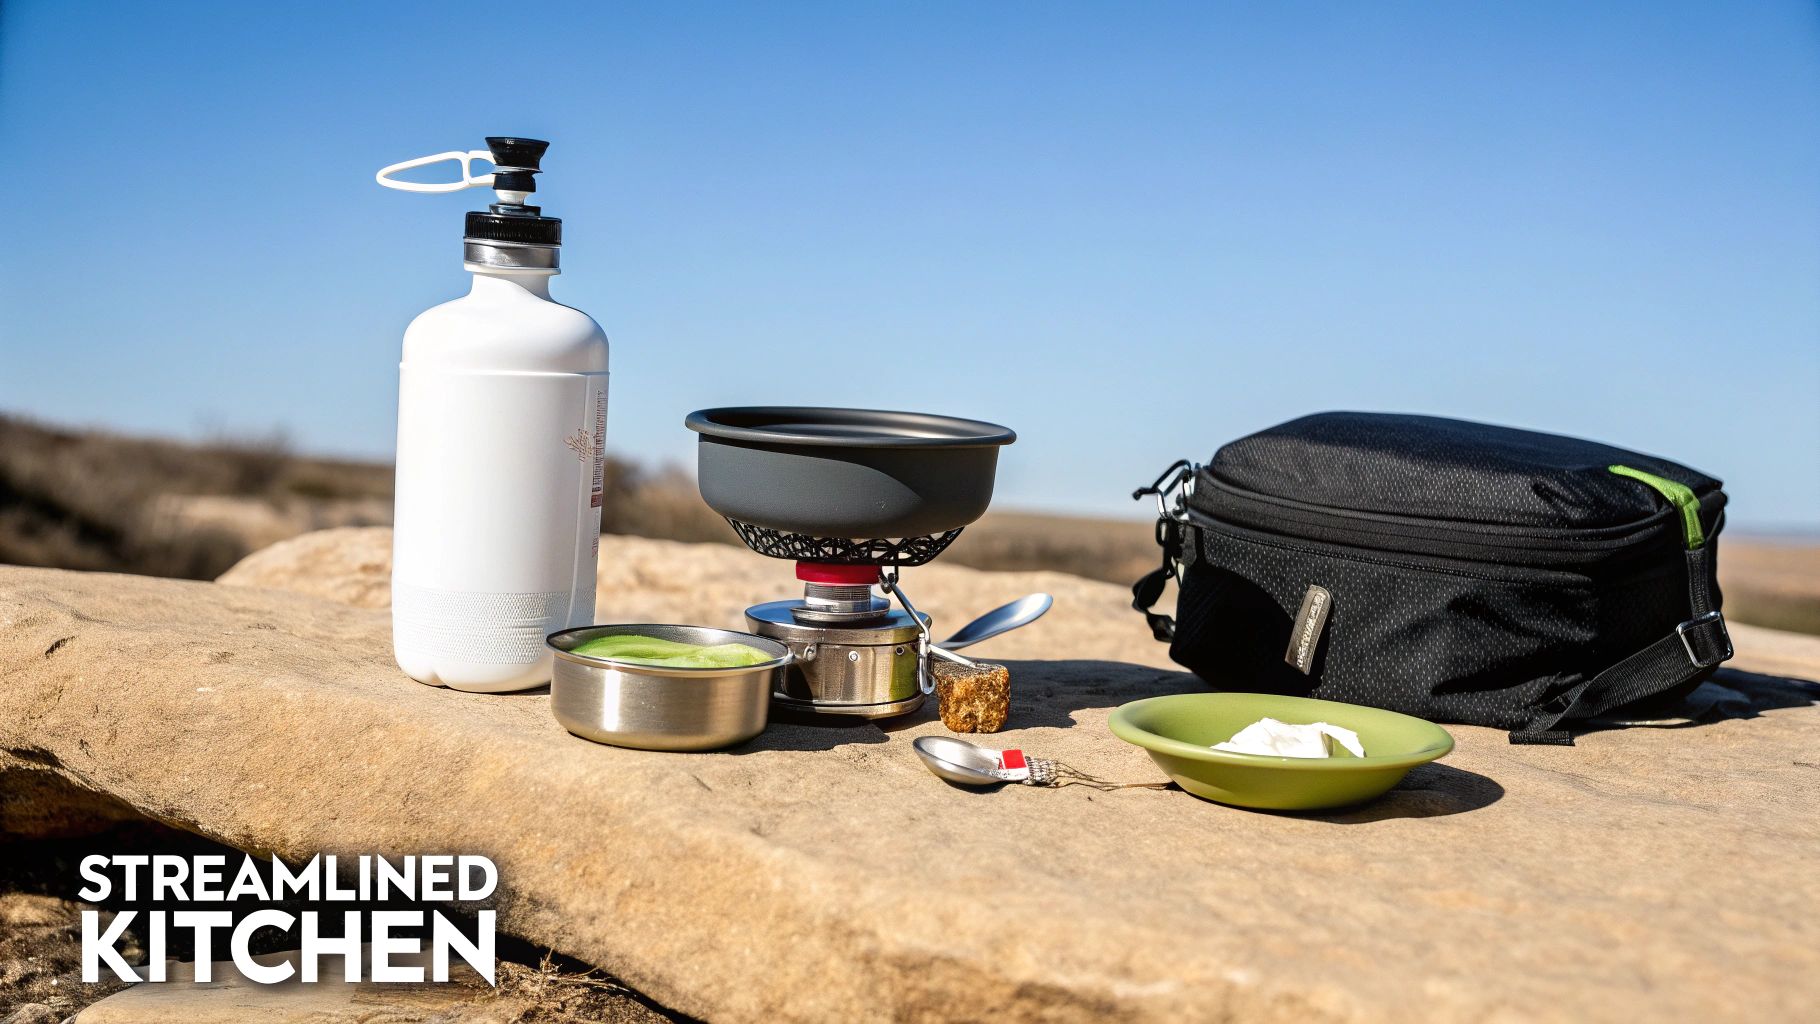
Think about the typical kitchen setup: a rigid pot, a separate mug, a clunky bowl, and a hard-sided water bottle. They work, but they hog a fixed amount of space in your pack whether they’re full or empty. The ultralight mindset challenges this by choosing gear that adapts as you go.
From Stoves to Cold Soaking
How you prep your food is the heart of your kitchen, and it really sets the tone for everything else. Your choice here is a spectrum, and you've got to find your own balance between weight and convenience.
- Canister Stoves: There's a reason everyone loves systems like the MSR PocketRocket 2 or the ridiculously light BRS-3000T. They boil water in a flash, weigh just a few ounces, and are dead simple to operate. This is the way to go if you can't live without a hot meal or coffee after a long day of hiking.
- Cold Soaking: This is the hardcore minimalist approach. You ditch the stove and fuel entirely. All you need is a leak-proof jar (an old Talenti gelato container is a trail classic) to rehydrate your food with cold water over an hour or two. It's not for everyone, but you can't beat the weight savings.
Diving into different kinds of portable cooking equipment can help you figure out what matches your style. Getting this one piece right can shave off a surprising number of ounces.
The Power of Collapsible Gear
This is where the magic really happens. Imagine swapping out that bulky Nalgene and a rigid bowl for gear that literally shrinks as you use it. That's the whole idea behind bringing collapsible items into your kit.
Think about it: over a three-day trip, you might drink 6-8 liters of water and eat six meals. With rigid containers, the space they take up never changes. With collapsible gear, you actually get that space back, making your pack smaller and tighter as you go.
This is a huge benefit for anyone, whether you're a serious thru-hiker or a parent trying to fit snacks and gear for the whole family into one bag for a day trip. A HYDAWAY 25oz Collapsible Bottle works just like any other bottle when you need it, but once you've drained it at camp, it squishes down to about an inch thick. You can just slide it into a side pocket, completely out of the way.
Pair that with a HYDAWAY Collapsible Bowl. Use it for your oatmeal in the morning and your chili at night. When you’re done, it flattens completely, taking up almost zero room. This simple swap frees up a massive amount of volume inside your pack, which can even let you get away with a smaller, lighter backpack overall. It’s a key ultralight principle: your pack should shrink as your consumables disappear. For more ideas on this, check out our full guide to collapsible camping cookware and see how it can totally change your packing game.
Water Treatment and Fuel Strategy
The final pieces of your minimalist kitchen are smart water and fuel habits. Modern filters like the Sawyer Squeeze are pretty much standard now, weighing just a couple of ounces while giving you safe drinking water whenever you find a source. This means you don't have to haul liters of heavy water from one camp to the next.
Be just as strategic with your fuel. A small 100g canister is usually more than enough for a solo hiker on a weekend trip who's just boiling water for dinners. Weigh your canister before you leave so you aren't carrying fuel you don't need. Every single gram you save in the kitchen is one less gram you have to lug up that next climb.
Building a Smart Layering System for Your Clothes
Your clothing is arguably the most critical part of your backpacking kit. It's your personal climate control system out on the trail, and getting it right is a game-changer. The secret isn't to pack for every imaginable weather event; it's to choose a handful of smart, multi-purpose pieces that all work together as a team.
Imagine layering like this: you have a simple t-shirt, a fleece, and a rain jacket. Getting warm on a steep climb? Shed the fleece. Wind kicking up on an exposed ridge? Throw the rain jacket on over everything. This approach is miles lighter and more adaptable than hauling around bulky, single-purpose jackets.
The absolute golden rule of trail apparel is to avoid cotton at all costs. Seriously. Cotton acts like a sponge, soaking up sweat and taking ages to dry. This can dangerously sap your body heat, even on a moderately cool day. Instead, you want to build your system around high-performance fabrics like merino wool or synthetics (think polyester and nylon). These materials actively pull moisture away from your skin, keeping you dry, warm, and comfortable.
The Three Core Layers
A bomber layering system has three distinct parts, and each has a very specific job. Once you master how they cooperate, you can stay comfortable in just about any weather without stuffing your pack.
- Base Layer: This is what you wear right against your skin. Its main job isn't warmth—it's wicking sweat away so you stay dry. For most three-season hiking, a simple merino wool or synthetic t-shirt is the perfect foundation.
- Mid-Layer: Now we're talking insulation. This layer's job is to trap your body heat and keep you toasty. A classic fleece jacket or a lightweight puffy (filled with either down or a synthetic alternative) is exactly what you need here. It's the piece you'll toss on during rest breaks or when the evening chill sets in.
- Outer Shell: This is your armor against the elements, namely wind and rain. A quality rain jacket is non-negotiable. Look for one that's both waterproof and breathable. The great part is that it also doubles as a windbreaker, which means one less piece of gear to carry.
Gear That Actually Fits
Thankfully, the backpacking world has moved way past the old "shrink it and pink it" approach to women's gear. For years, women had to make do with equipment designed for men's bodies, which often meant a terrible fit and a miserable time on the trail. Today, brands understand that a proper fit is a matter of performance and safety, especially with so many women getting outdoors.
This shift is super clear in the boom of women's-specific gear. The latest 2024 and 2025 gear previews are packed with options tailored to female biomechanics, from backpacks with shorter torso lengths to clothing cut for different body shapes. It’s a long-overdue acknowledgment that women are a huge part of the outdoor community and deserve gear that truly works. Here at HYDAWAY, we’re all about serving every kind of adventurer, from moms at theme parks to retirees checking off their bucket lists, and this inclusive direction in the market is something we're excited to see.
If you want to see just how much the options have improved, you can explore tons of women's specific gear lists and recommendations at Lady on a Rock.
By carefully choosing a few versatile, high-performance pieces that fit you like a glove, you can build a complete clothing system that keeps you safe and comfortable for a fraction of the weight of a traditional closet's worth of clothes. This smart, minimalist philosophy is at the very heart of a successful light backpacking setup.
Getting Smart With Modern Electronics And Safety Tools
Let's face it, even when we're trying to disconnect, technology has a place in the backcountry. In fact, a few smart electronics have become critical safety and navigation tools on any modern light backpacking gear list. The real trick isn't if you should bring them, but how to do it without piling on the weight and complexity.
The days of lugging a clunky GPS unit alongside your paper maps are mostly behind us. Our smartphones are incredibly powerful navigation devices, capable of running sophisticated apps like Gaia GPS or AllTrails that can store detailed maps for offline use. For most trips on well-marked trails, your phone plus a reliable power bank is a powerful, lightweight solution.
But when you're heading somewhere more remote or rugged, a dedicated satellite messenger offers a level of safety your phone just can't touch. These little devices are a lifeline that works far, far beyond the reach of cell towers.
The Satellite Messenger: Your Backcountry Lifeline
What used to feel like a luxury for hardcore expeditions is now pretty standard safety gear. It’s hard to overstate the peace of mind these devices offer, and for just a few ounces, they’re a worthy addition for solo hikers, families, or anyone venturing into spotty service areas.
These devices have fundamentally changed how we think about risk in the backcountry. For the weight of an energy bar, you get the power to call for rescue, pull weather updates, and message loved ones from just about anywhere on the planet. Safety is never the place to cut corners.
Satellite communicators have shrunk from bulky, expensive gadgets into compact essentials. We've seen a massive shift in backpacking culture, where devices like the Garmin inReach Mini 2 are now considered must-haves. It weighs a tiny 3.5 ounces (99 grams) but packs in two-way texting, GPS tracking, and that all-important SOS button. This tech is a game-changer for modern adventurers—from digital nomads exploring remote corners of Asia to retirees enjoying vacations in Hawaii or Europe—keeping them connected and safe.
Powering Your Adventure Without The Weight
Of course, all this tech is just dead weight without power. A lightweight power bank is non-negotiable.
A 10,000 mAh power bank gives you the best bang for your buck, balancing capacity and weight perfectly. Something like the popular Nitecore NB10000 will have enough juice to recharge your phone and headlamp multiple times over a long weekend.
And speaking of headlamps, modern LED tech has made them smaller, brighter, and more efficient than ever. A perfect example is the Nitecore NU25, a USB-rechargeable powerhouse that weighs just over an ounce. Its multiple brightness settings and solid battery life have made it a favorite in the ultralight world. Best of all, it means you can leave the spare AAA batteries at home, trimming a little more weight and simplifying your kit. When you choose rechargeable, multi-functional electronics, you make sure your tech is working for you, not weighing you down.
How To Pack Your Gear for a Balanced Load
Nailing the perfect light backpacking gear list is a huge win, but how you pack it all is where the magic really happens. Getting the gear into your bag correctly is that final, crucial step that makes or breaks your comfort and stability on the trail.
A poorly packed bag, even a light one, will feel clumsy and exhausting. A balanced load, on the other hand, feels like a natural extension of your body.
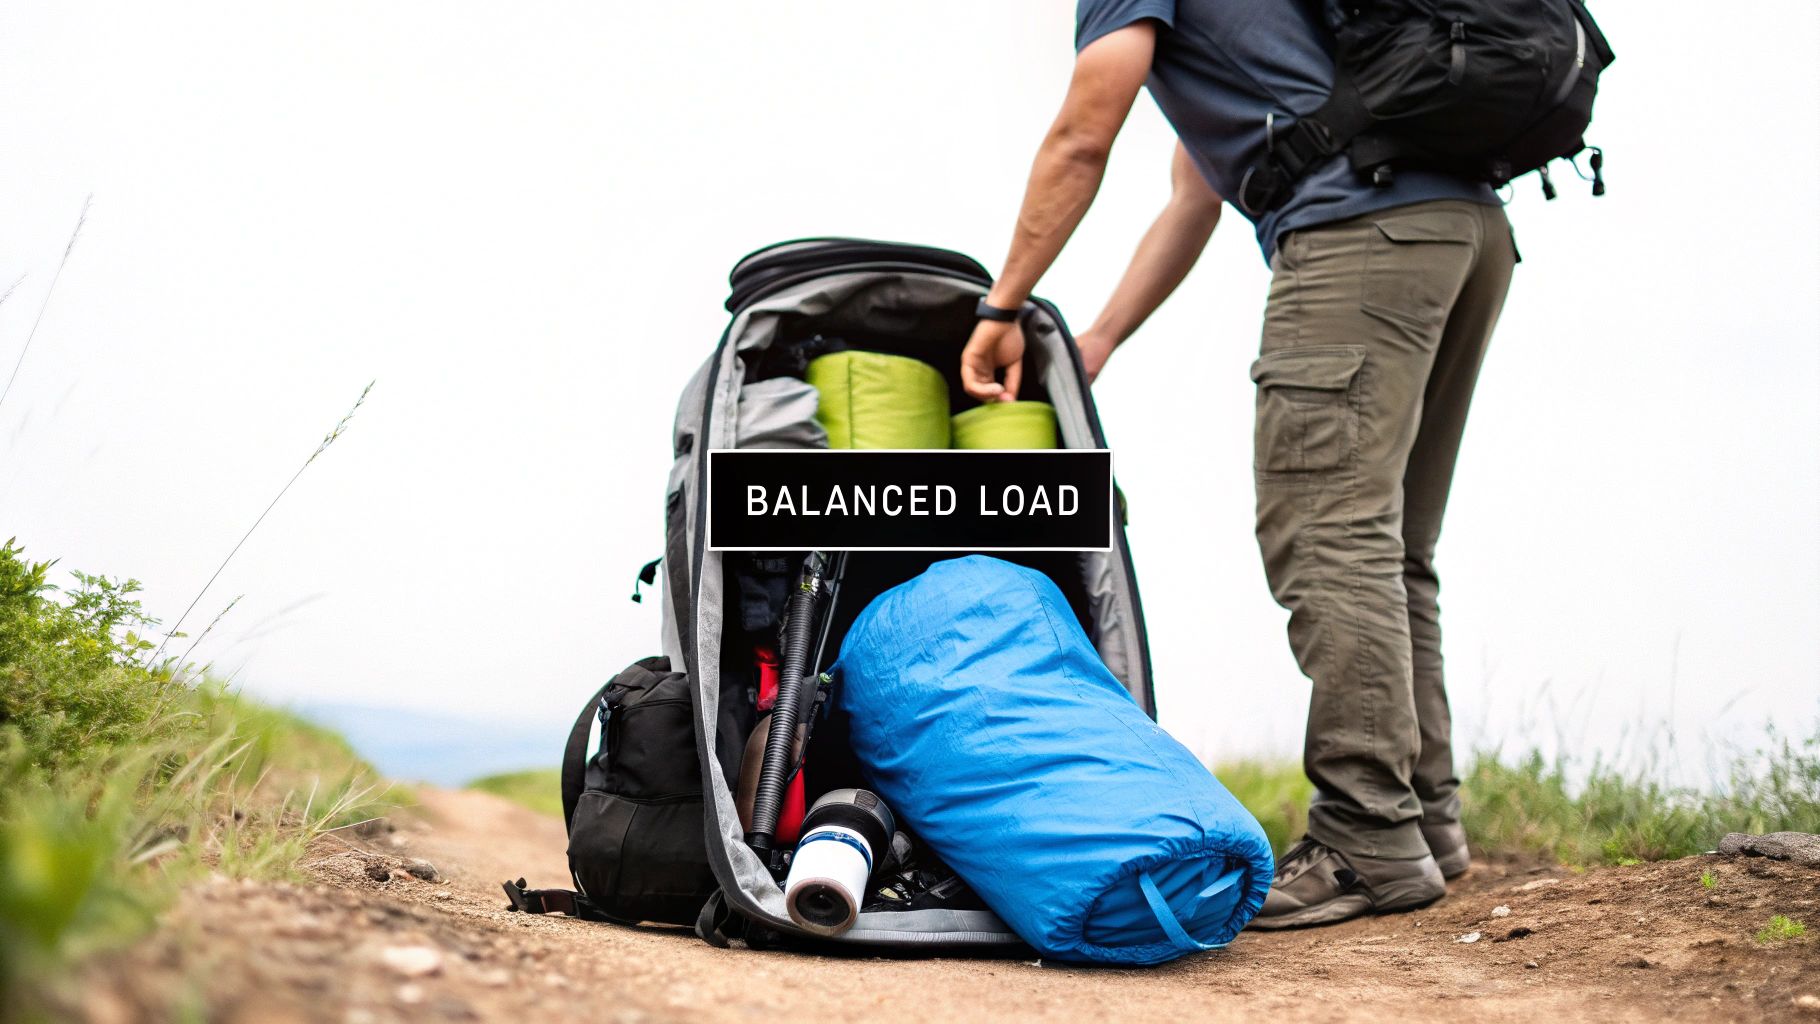
Think of it like building a tower out of stones. If you put the heaviest ones on top, the whole thing will be wobbly and ready to fall. The goal is to create a low center of gravity, keeping the weight hugged tight against your spine and resting squarely on your hips.
The Zones of Your Backpack
An easy way to get this right every time is to picture your pack in three distinct zones, stacked from bottom to top. Each zone has a specific job based on weight and bulk.
- Bottom Zone (Bulky but Light): This is home for your sleeping bag and any extra sleep clothes. These items take up space but don't weigh much, creating a solid base that won't make your pack bottom-heavy.
- Core Zone (Heaviest Items): This is the most important area, right up against your spine in the middle of your back. Your heaviest gear—like your food bag, a full water reservoir, and your cook set—belongs here. Centering this dense weight stops the pack from pulling you backward.
- Top Zone (Frequently Used & Lighter Gear): Reserve this spot for your puffy jacket, rain shell, first-aid kit, and snacks. You want to be able to grab these items without digging through everything. Keeping this zone light also ensures your pack remains stable and doesn't feel top-heavy.
The Role of Collapsible Gear in Smart Packing
This is where smartly designed, packable gear really proves its worth. Items like a HYDAWAY Collapsible Bowl or Collapsible Bottle allow your pack to become more dynamic. As you eat your food and drink your water, these items shrink down, freeing up precious internal space.
This simple change helps you keep your load tight, compact, and balanced throughout your trip.
A pack that shrinks with your consumables is a more efficient pack. It prevents gear from shifting around, which helps maintain a stable center of gravity and reduces the annoying feeling of a half-empty, sloshing bag.
After you've packed, the next step is a "shakedown" hike. This is just a short, local overnight trip to test your entire system. It’s your chance to feel how the weight carries, pinpoint any annoying hot spots, and ditch anything you realize you don’t actually need before the main event.
Refining your kit is a journey, not a destination. It’s a process of learning what works for you and adapting your gear choices over time. Creating the perfect light backpacking setup is about empowering your adventures, not just buying a bunch of gear.
Light Backpacking FAQs
Diving into the world of lighter backpacking is a journey, and like any good trek, it comes with plenty of questions. Getting good answers can make all the difference, turning a potentially frustrating gear overhaul into an exciting and rewarding experience. Let’s tackle some of the most common things hikers wonder about when they start trimming down their pack weight.
This is all about helping you prioritize your upgrades, balance safety with weight, and prove you don’t need a massive budget to lighten your load.
What Gear Should I Upgrade First To Save Weight?
When you’re ready to start shedding pounds, the single most impactful step is to focus on your "Big Four"—that’s your backpack, shelter, sleeping bag, and sleeping pad. These items are the foundation of your base weight, and upgrading just one can drop multiple pounds in a single go.
Your shelter or sleeping bag is often a great place to start. Swapping a traditional four-pound tent for an ultralight model that weighs under two pounds is a huge, immediately noticeable win. The same goes for your sleep system; switching from a bulky synthetic sleeping bag to a lightweight, highly compressible down quilt can slash both weight and packed size dramatically.
Upgrading one of the Big Four creates a fantastic ripple effect. A lighter, smaller sleep system means you can get away with a smaller, lighter backpack, which snowballs into more weight savings across your entire kit.
How Do I Balance Weight Savings With Safety?
This is a critical question, and it gets at a common myth that "ultralight" means "unsafe." The truth is, a thoughtfully assembled light gear list is often safer than a traditional heavy one. It reduces physical strain, lowers your risk of injury, and helps you stay more alert and aware on the trail.
The key is to be "smart light," not "stupid light." You never, ever sacrifice essential safety items like a first-aid kit, navigation tools, or the right clothing for the conditions just to save a few ounces. Always pack for the most challenging weather you could realistically face on your trip. The goal is to choose the lightest functional option for each critical piece of gear—not to leave it at home.
Can I Build a Light Gear List On a Budget?
Absolutely. While the price tags on some top-tier ultralight gear can make your eyes water, you can definitely achieve a lightweight setup without breaking the bank. The first step is free: weigh every single item you currently own. You'll be surprised where the ounces and pounds are hiding.
From there, focus on finding multi-use items, research budget-friendly but well-regarded brands, and keep an eye out for secondhand gear on forums or at local gear swaps. Honestly, some of the biggest savings come from simply learning what you don't need and leaving those "just in case" items at home.
How Does Collapsible Gear Help In Light Backpacking?
Collapsible gear is a game-changer for smart, efficient packing. Its biggest advantage is how much bulk it cuts down, which is just as important as reducing weight. Think about it: a rigid water bottle or bowl takes up the same amount of precious space in your pack whether it's full or empty.
This is where gear from HYDAWAY really shines. A HYDAWAY Collapsible Bottle gives you durable, leak-proof hydration when you need it, but once it’s empty, it flattens to about an inch thick. That frees up a ton of volume inside your pack, allowing the whole bag to compress as you use up your water. For anyone on the move—from backpackers on the trail to travelers navigating airports—this dynamic packing keeps your load tighter, more stable, and ultimately way more comfortable to carry.
Ready to make your pack more efficient? Explore the full range of space-saving, ultra-portable gear from HYDAWAY and see how our collapsible bottles, bowls, and drinkware can help you carry less and do more on every adventure. Start building your smarter, lighter kit today.


