Beginner Backpacking Gear: Essentials for New Hikers

Diving into your first backpacking trip is a huge thrill, but let's be honest—staring at a wall of gear can feel like a lot. The secret is to start with what experienced hikers call the "Big Three": your backpack, shelter, and sleep system. Think of these as the foundation of your mobile home in the backcountry. Get these right, and you've already won half the battle.
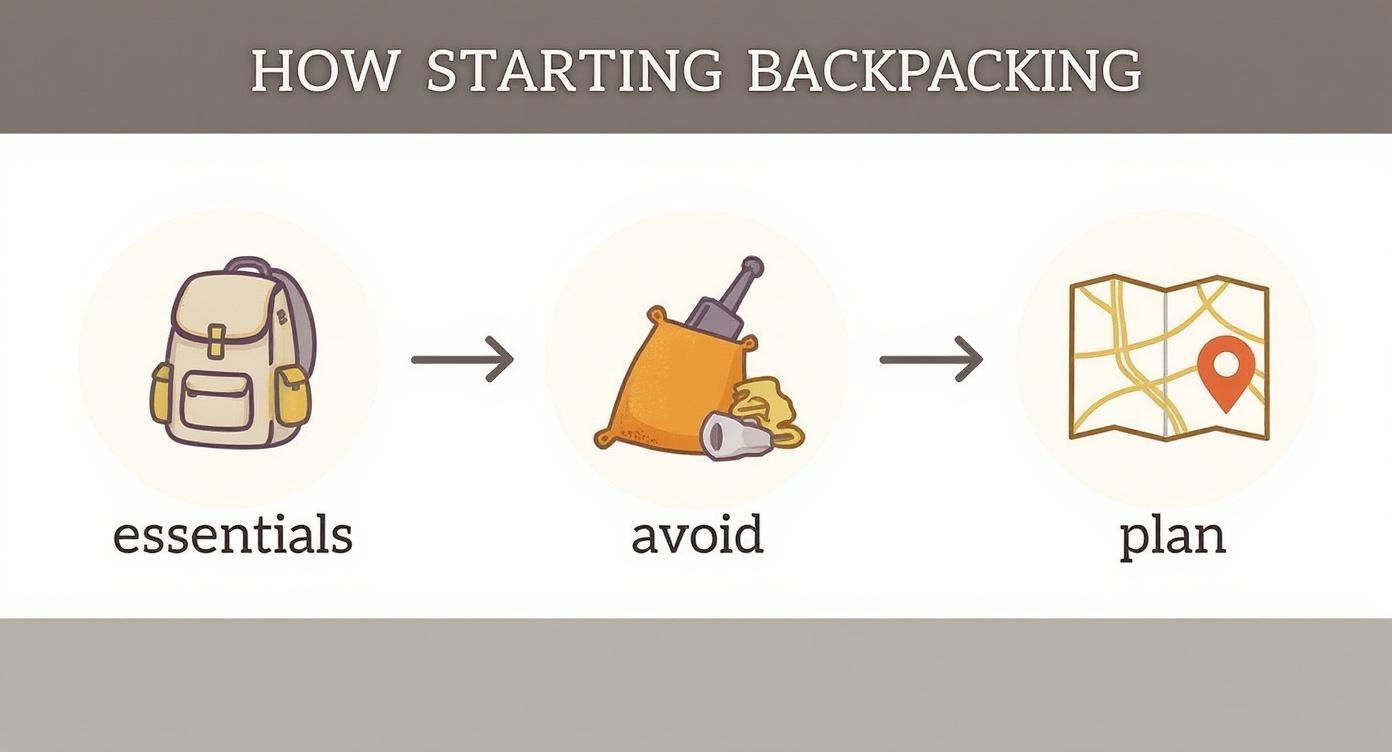
Starting Your Backpacking Journey Without Stress
It’s easy to get intimidated by all the shiny gadgets and technical jargon. This guide is here to cut through the noise. We'll focus on the absolute essentials you need for a safe, comfortable, and genuinely fun first trip. Forget the pressure to buy every cool-looking piece of equipment right away; the goal is to build your kit thoughtfully.
We want to help you sidestep those classic beginner mistakes. You know, like cramming your pack with a dozen "just-in-case" items you'll never touch, or splurging on specialized gear meant for climbing Everest when you're just planning a weekend hike. A smart, simple approach makes your pack lighter and your time on the trail way more enjoyable.
Focusing on What Truly Matters
Instead of thinking about a long list of individual items, try to see your gear as a few interconnected systems. It’s a simple mental shift that makes everything clearer. You're just prioritizing the essentials, ditching the excess, and planning an awesome adventure.
The biggest takeaway here? A great trip doesn’t start when your boots hit the dirt—it starts with mindful packing at home. You're not the only one getting into this, either. The global hiking gear market was valued at around USD 8.43 billion in 2025 and is only getting bigger.
This surge in popularity is great news for newcomers, as it means more innovation and better, more accessible gear. And to really hike without a worry in the world, it's always a good idea to look into specialized adventure travel insurance.
Remember: The best beginner backpacking gear isn't the most expensive—it's the gear that correctly matches your needs for comfort, safety, and the specific environment you'll be exploring.
As you start pulling your kit together, keep an eye out for items that can pull double duty. For instance, a HYDAWAY collapsible water bottle is perfect for short side-hikes from your main campsite. Instead of lugging a big, rigid bottle, you can fill your HYDAWAY, and when it's empty, it squishes down to almost nothing to fit right in your pocket.
To help you visualize these core systems, here’s a quick breakdown of the essential gear categories.
Essential Beginner Backpacking Gear Categories at a Glance
This table gives you a bird's-eye view of the main gear categories you'll need to think about for your first backpacking adventure.
| Gear Category | Primary Function | Key Feature to Look For |
|---|---|---|
| Backpack | Carries all your gear comfortably and efficiently. | Proper fit for your torso length and hip size. |
| Shelter | Protects you from rain, wind, and bugs. | Weather resistance and low weight. |
| Sleep System | Keeps you warm and comfortable for a good night's rest. | Temperature rating appropriate for the conditions. |
| Cooking System | Allows you to prepare hot meals and drinks on the trail. | Fuel efficiency and ease of use. |
| Water Treatment | Purifies water from natural sources to make it safe to drink. | Lightweight, fast, and effective against common pathogens. |
| Clothing | Protects you from the elements and helps regulate body temp. | Layering capability and moisture-wicking materials. |
| Safety & First Aid | Prepares you for unexpected injuries or emergencies. | Comprehensive kit tailored to the length of your trip. |
Getting a handle on these key areas will give you the confidence to choose gear that works for you, ensuring your first trip is the start of many more to come.
Choosing Your Backpack: Your Home on the Trail
Think of your backpack as less of a suitcase and more of your mobile command center. It’s the single most important piece of gear you'll buy, and a great one distributes weight so well you barely notice it's there. A bad one, on the other hand, can turn an amazing trip into a slog.
Getting the right fit is everything, and it starts with a measurement you might not expect: your torso length. Forget your overall height; what matters is the distance from the base of your neck down to the top of your hip bones. This measurement determines your pack size (small, medium, large) and ensures the hip belt sits just right. A well-fitted pack channels about 80% of the weight onto your hips, saving your shoulders from a world of hurt.
Finding the Right Size and Features
Once you know your torso length, it’s time to think about capacity, which is measured in liters. For most weekend warriors heading out for one-to-three-night trips, a pack in the 40 to 60-liter range is the sweet spot. It’s plenty of room for the essentials without tempting you to bring your entire closet.
You'll quickly see that modern packs are loaded with thoughtful features. The outdoor backpack market is booming—it's expected to grow by nearly USD 997.1 million between 2024 and 2029—largely because brands are constantly innovating for hikers like you. Handy additions like built-in rain covers, smartly placed pockets, and trekking pole loops are becoming common. You can dive deeper into these product trends and market insights on Technavio.com.
Your backpack should feel like an extension of your body. When you try one on in the store, ask to add some weight—around 15-20 pounds is perfect—to get a real feel for it. Walk around, lean over, and check for any spots that pinch or rub.
Key Features for Beginner Backpacks
Don't get lost in the technical jargon. When you’re starting out, focus on the features that truly boost comfort and make life on the trail easier. Here’s what to look for:
- Adjustable Suspension: This is a must-have. It lets you fine-tune the shoulder straps and hip belt for a custom fit that matches your body perfectly.
- Padded Hip Belt and Shoulder Straps: Seriously, don't skimp on this. Good cushioning is non-negotiable for carrying a load comfortably over miles of trail.
- Load Lifter Straps: These little straps at the top of your shoulders are magic. They pull the pack’s weight in closer to your back, which makes you feel much more stable and balanced.
- External Pockets: Easy access is key. Side pockets for water bottles and a big mesh pocket on the front are perfect for stashing things you’ll need on the fly, like your rain jacket or a collapsible bottle. For example, you can stash your HYDAWAY bottle in a side pocket for quick sips, so you don't have to stop and dig through your main compartment.
Building Your Backcountry Sleep Sanctuary
After a long day of putting miles behind you, nothing feels better than crawling into a cozy shelter. A great night's sleep is what turns a tough trek into an amazing memory, and your tent and sleep system are the keys to making that happen. This setup is your personal haven, protecting you from whatever the elements throw your way so you can recharge for the next day’s adventure.
Think of your shelter and sleep system as three crucial parts that work together: the tent (your house), the sleeping bag (your blanket), and the sleeping pad (your mattress). Each piece depends on the others to keep you warm, dry, and comfortable. Getting this combination right is one of the biggest wins when you're picking out your first set of backpacking gear.
Choosing Your First Tent
For most beginners, a 3-season, double-wall tent is the perfect place to start. Don't let the name fool you; "3-season" just means it's designed for the most common backpacking conditions in spring, summer, and fall. It’ll offer solid protection from rain and wind without being total overkill for mild weather.
The "double-wall" design is a game-changer. It has an inner tent body, which is mostly mesh for awesome ventilation, and a separate waterproof outer rainfly. This two-part system works wonders to prevent that clammy condensation buildup inside your tent.
Decoding Your Sleep System
Your sleeping bag and pad are a tag team that keeps you insulated. A sleeping bag's warmth comes from its fill material, which traps your body heat to create a pocket of warm air around you. The two main players here are down and synthetic.
- Down Insulation: This stuff is made from goose or duck plumage, and it's incredible. It's super lightweight, packs down tiny, and gives you the best warmth for its weight. The catch? It loses its insulating superpowers when it gets wet and usually costs a bit more.
- Synthetic Insulation: This man-made polyester fill is a bit bulkier and heavier than down, but it has a huge advantage: it keeps you warm even when it's damp. It's also much friendlier on the wallet, making it a fantastic choice for new backpackers.
The sleeping pad is just as important—seriously. It doesn't just provide cushiony comfort; it insulates you from the cold ground, which can suck your body heat away faster than you'd think. A pad’s insulating power is measured by its R-value; the higher the number, the warmer it will be. For 3-season backpacking, look for a pad with an R-value somewhere between 2 and 5.
A classic rookie mistake is splurging on an expensive, warm sleeping bag but pairing it with a cheap, low R-value pad. Your bag can't do its job if the cold ground is stealing all your heat from underneath. Always think of your bag and pad as a single unit.
By carefully picking a versatile tent and a sleep system that matches the conditions you expect, you’ll create a backcountry sanctuary you can count on. As you gain more experience, you might want to explore different setups, and our guide to creating an ultralight camping gear list can show you how to start shedding pounds without giving up comfort.
Mastering Trailside Cooking and Hydration
Let's be honest: fueling your body on the trail is non-negotiable. But your backcountry kitchen doesn’t need to be some complicated, multi-piece affair. A simple, reliable setup makes all the difference between a hot, morale-boosting meal at sunset and a frustrating, hangry evening.
The goal is pretty straightforward: choose a system that boils water quickly and efficiently. That's the key for rehydrating those freeze-dried meals and, of course, making that essential morning coffee.
Your cooking setup really just boils down to three core pieces: a stove, fuel, and a pot. For most folks just getting into backpacking, a canister stove is the perfect starting point. These little guys screw directly onto a pre-pressurized fuel canister, making them incredibly easy to use—just turn the valve, click your lighter, and you've got a flame.
They're lightweight, pack down small, and give you great control over the heat. And to keep your energy levels steady between those hot meals, it's always a good idea to pack some high-protein savory snacks for easy fuel on the move.
Staying Safely Hydrated
Just as critical as food is water. Even the most pristine-looking mountain stream can harbor microscopic critters that will absolutely ruin your trip (and the week after). This is why you must always treat water from natural sources before you even think about drinking it.
Thankfully, modern water filters make this process fast and completely painless.
Squeeze filters, like the ever-popular Sawyer Squeeze, are a fantastic choice for beginners. You just fill up a pouch with "dirty" water from a creek, screw on the filter, and squeeze clean, drinkable water right into your bottle. They're super effective, barely weigh anything, and don't involve any weird-tasting chemicals or long wait times.
A classic rookie mistake is not planning for enough water capacity. It’s always smart to be able to carry at least two liters of water, especially in hot weather or on ridge hikes where sources are miles apart. Having a system that's easy to use will genuinely encourage you to drink more.
Smart Hydration Solutions On The Move
A great hydration strategy involves a primary reservoir for all your filtered water and a smaller, more accessible bottle for sipping while you walk. This is where a HYDAWAY collapsible bottle becomes an invaluable part of your kit.
After you filter a bunch of water from a creek into your main container, you can pour some into your HYDAWAY bottle. This gives you an easy-to-grab drink without having to stop, take your pack off, and rummage through everything.
Once it’s empty, it collapses down to just over an inch thick, saving a massive amount of space in your pack. It’s a smart system that keeps you hydrated and your pack organized. For more tips on nailing your trail hydration, check out our guide to the best water bottles for hiking.
Dressing Smart With Layers and Footwear
Let's talk about staying comfortable on the trail. It’s not about jamming your pack full of clothes for every possible forecast. The real secret is a smart, adaptable layering system—your own personal thermostat that you can adjust as you hike.
Getting your clothing system right is so important that market data shows it makes up the largest slice of beginner backpacking gear at 49.7%. That’s more than packs, tents, or anything else. If you're curious about the numbers, you can explore the full research on Grandviewresearch.com.
Think of your clothing like building a house for your body. You’ve got the frame, the insulation, and a weatherproof shell. Each piece has a specific job, and together they keep you comfortable and safe, rain or shine.
The Three Core Layers of Outdoor Clothing
A good layering system lets you add or subtract pieces to match the weather and how hard you're working. This way, you avoid getting drenched in sweat on a tough climb or freezing at a windy viewpoint.
-
Base Layer (Your Second Skin): This is the piece right against your skin. Its one and only job is to pull sweat away from your body so you stay dry. You'll want materials like merino wool or synthetics (polyester, nylon). Just remember the golden rule of the outdoors: avoid cotton at all costs. It acts like a sponge, soaking up moisture and clinging to your skin, which can dangerously sap your body heat.
-
Mid-Layer (Your Insulation): This is your warmth layer. Its purpose is to trap the body heat that your base layer worked so hard to keep dry. Fleece jackets, down vests, or puffy synthetic coats are perfect for this. This is the layer you’ll likely be taking off and putting back on all day long.
-
Outer Shell (Your Weather Armor): Think of this as your shield against wind and rain. A solid waterproof and windproof jacket isn't just nice to have; it's a critical piece of safety gear. Look for a lightweight shell that packs down small, making it easy to toss in your pack when the sun decides to show up.
Your Most Important Connection to the Trail
Your feet are your engine out there, and the right footwear is your best line of defense against blisters, achy joints, and trail fatigue. Whether you go with boots, shoes, or trail runners is a personal call and depends a lot on the terrain you plan to cover.
One of the most common mistakes beginners make is thinking they need massive, rigid boots for any kind of hike. Plenty of experienced backpackers now swear by the lightweight freedom of trail runners, but the key is to match your footwear to your needs.
Here's a quick rundown to help you figure out what's best for you:
- Hiking Boots: These guys offer the most ankle support, which is a huge plus when you're carrying a heavy pack over rough, unstable ground. They're built to last but are usually heavier and need to be broken in before a big trip.
- Hiking Shoes: The happy medium. They're low-cut like a sneaker but have the stiffer sole and tough build of a boot. They're fantastic for day hikes or backpacking trips where you've managed to pack light.
- Trail Runners: The lightest and most flexible option by far. They give you great traction and need almost no break-in time, which is why they've become a favorite for so many backpackers, especially on well-maintained trails.
No matter which style you land on, pair them with high-quality wool socks. They cushion your feet, manage moisture worlds better than cotton, and are your single best tool in the endless war against blisters.
The Ten Essentials: Your Backcountry Safety Net
Real confidence on the trail isn't about having the fanciest, most expensive gear. It’s about knowing you’re ready for whatever the wilderness throws at you. That's where the Ten Essentials come in.
Think of this list less as individual items and more as ten systems designed to get you through a tough spot. We're not talking about packing for a full-blown disaster, but about having the right tools to turn a potential emergency into just an inconvenient story to tell later. A sprained ankle is annoying if you have a headlamp and extra food; it’s a life-threatening problem if you don’t.
Core Safety Systems for Every Single Trip
The modern list of the Ten Essentials is grouped by what it does for you, making it way easier to remember why you're carrying it. This is the definitive safety checklist that every backpacker—from their first trip to their thousandth—should have in their pack, every single time. No exceptions.
- Navigation: You need a physical map and a compass. Yes, even if you have a GPS or your phone. Batteries die, screens crack, but a compass always knows which way is north.
- Headlamp: This is your main light source. Always, always pack extra batteries. A simple headlamp becomes your best friend if a short delay keeps you on the trail after the sun goes down.
- Sun Protection: This means sunglasses, broad-spectrum sunscreen, and a hat. Sunburn isn't just uncomfortable; at high elevations, it can quickly turn into a serious medical issue.
- First-Aid Kit: Buying a pre-made kit is a great starting point. Make sure you personalize it by adding any of your own medications and, crucially, good blister care like moleskin.
- Knife or Multi-Tool: You’ll use this for everything—gear repairs, slicing a block of cheese, and a hundred other little tasks you can't predict.
- Fire: Pack multiple ways to make a fire. Waterproof matches, a lighter, and a fire starter give you redundant options for creating life-saving warmth or signaling for help.
Your safety gear is only as good as your ability to use it. Take the time to practice with your compass, start a fire, and set up your emergency shelter before you're in a situation where you actually need them.
- Emergency Shelter: Even with a tent in your pack, you should carry a lightweight emergency bivy or a space blanket. If you get separated from your pack and main shelter, this tiny item can literally save your life.
- Extra Food: Always pack at least one extra day’s worth of food that doesn't require cooking. Think protein bars, nuts, or jerky—calories that are ready to eat when you need them most.
- Extra Water: Carry a reliable way to treat water, like a filter or tablets. On top of that, having a collapsible bottle like a HYDAWAY gives you the extra capacity to haul more water when you're facing a long, dry stretch of trail.
- Extra Clothes: Pack one extra insulating layer beyond what your forecast calls for. If you're forced to stop moving or spend an unplanned night out in the cold, that extra layer is absolutely critical for staying warm.
Your Top Beginner Backpacking Questions Answered
Stepping into the world of backpacking always kicks up a few questions. Getting solid answers now will help you lock in your gear choices and hit the trail feeling like you know what you're doing. Let's tackle the big ones.
How Much Should My Backpack Weigh?
A good rule of thumb is to keep your fully-loaded pack—that’s everything including food and water—under 20% of your body weight. So, if you weigh 150 pounds, you’re shooting for a 30-pound pack. Sticking to this makes the hike itself so much more enjoyable instead of a grueling slog.
The fastest way to shave off pounds is to focus on your "Big Three": your backpack, your shelter, and your sleep system. These three items are almost always the heaviest things you'll carry, making up the bulk of your base weight.
Do I Need to Buy Everything at Once?
Absolutely not! And honestly, you probably shouldn't. A full set of brand-new gear is a serious investment. For your first few trips, think about renting the big-ticket items like your backpack, tent, and sleeping bag from a local outdoor store like REI or a smaller local outfitter.
Renting or borrowing is the smartest first step. It lets you discover what you actually like—say, whether you prefer a certain type of sleeping pad or pack suspension—without dropping a ton of cash upfront.
What Is the Most Common Beginner Mistake?
Hands down, the classic rookie mistake is overpacking. It’s so easy to fall into the "just in case" trap, throwing in extra clothes or gadgets you don't really need. Remember, every single ounce adds up and you'll feel it on every uphill climb. Trust your layering system and fight the urge to pack duplicates.
Another common pitfall is not testing your gear before you go. You should always, always do a dry run. Pitch your tent in the backyard, fire up your stove to cook a meal, and walk around the block a few times with your pack fully loaded. It builds confidence and helps you smooth out any kinks before you’re miles away from civilization.
Ready to upgrade your hydration game with gear that saves space and performs beautifully? The HYDAWAY collapsible bottle is the perfect addition to any pack, giving you easy access to water without the bulk. Check out our full line of packable gear at https://myhydaway.com.


